
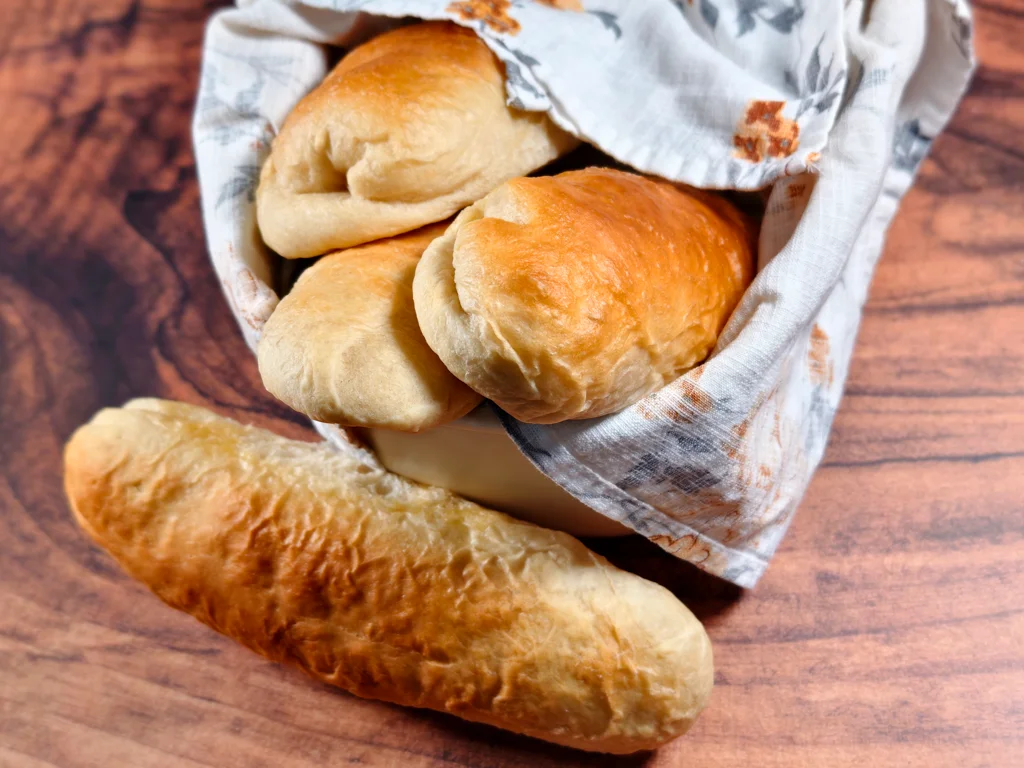
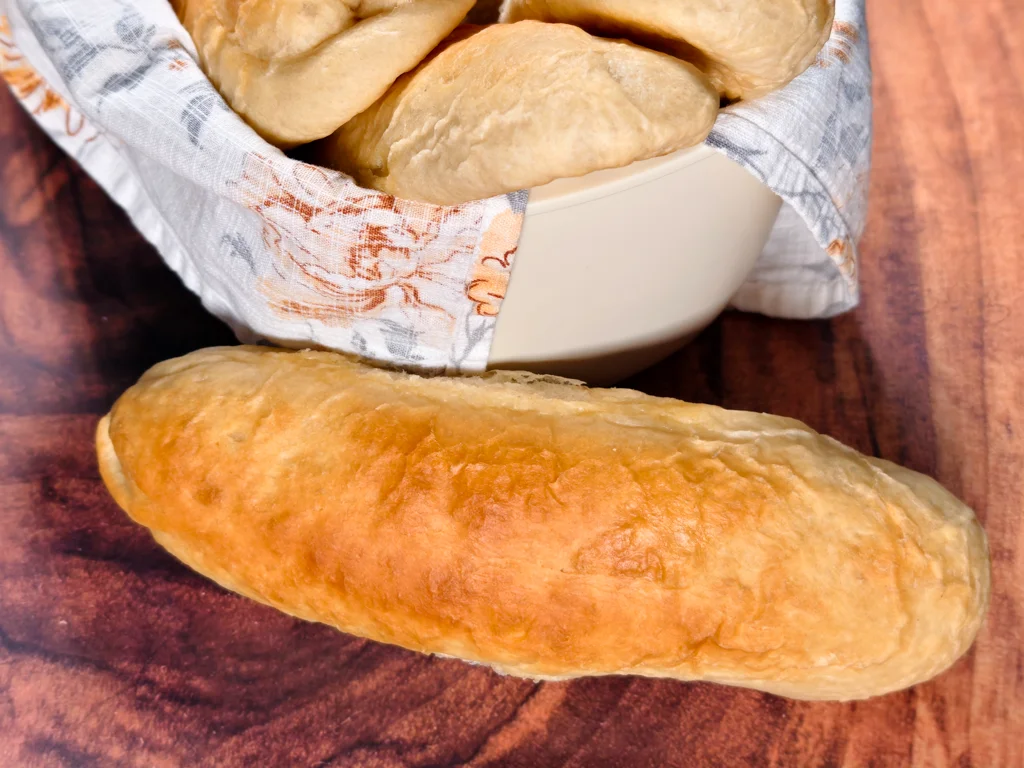
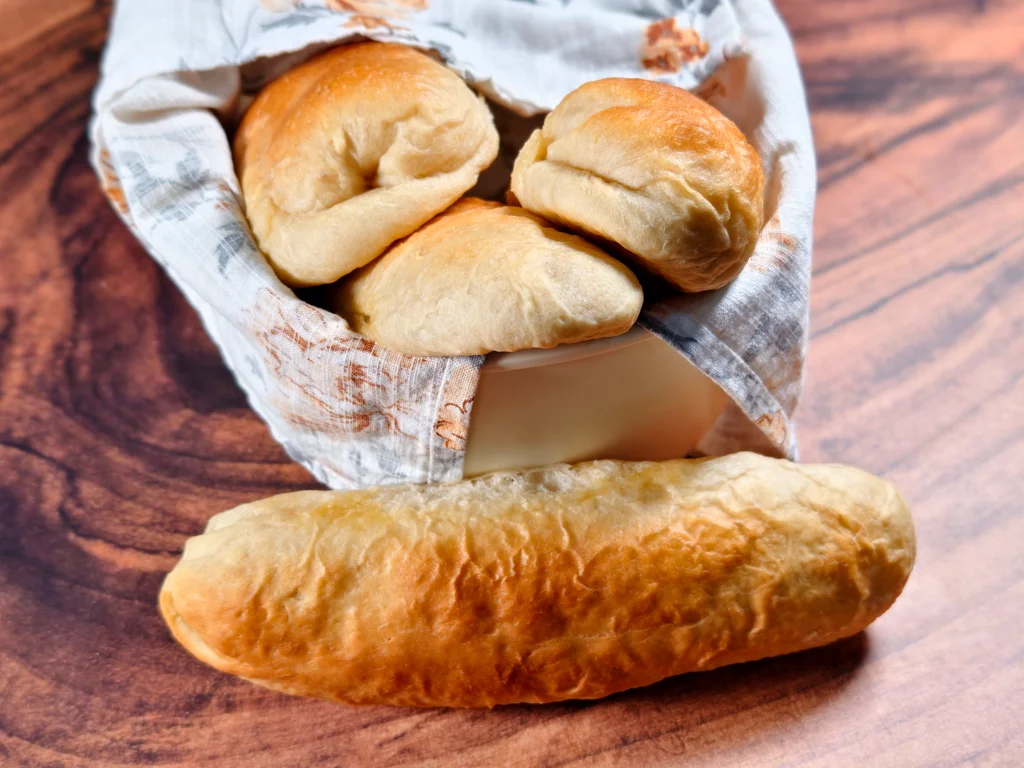
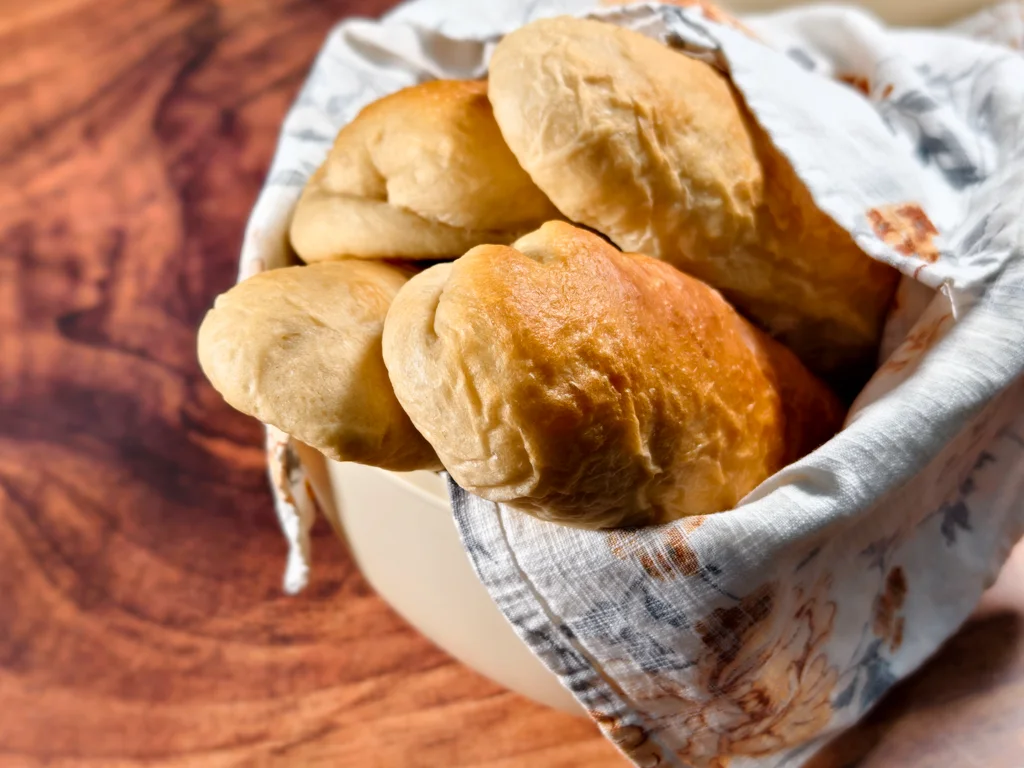
Sub sandwich rolls are big and fluffy, perfect for stuffing full of your favorite sandwich ingredients.
This is an easy recipe made even easier by using a stand mixer. If you don’t have a stand mixer, not to worry! Please read the recipe notes for instructions on how to make the sub sandwich rolls by using a bowl and wooden spoon, then kneading the dough by hand on a lightly floured surface.
Why I make sub sandwich rolls
We love a good sandwich in our home. Lunches typically consist of leftovers from dinner the night before, but when we’re feeling a little fancy, we make sandwiches using these sub sandwich rolls. I know that sounds silly, a sandwich is fancy? Yes, I think it can be. Think beyond sliced luncheon meat and American cheese. I’m talking grilled chicken Caesar salad sandwiches, chopped Italian subs, or caprese pesto sandwiches. The possibilities are endless and these sub sandwich rolls are your blank canvas.
As an Amazon Associate, I earn from qualifying purchases at no extra cost to you. This post contains affiliate links.
Equipment
- Stand mixer with bowl (dough hook attachment)
- Wooden spoon (if not using stand mixer)
- Large bowl (if not using stand mixer)
- Measuring cups
- Measuring spoons
- Spatula
- Baking sheet (18″x13″ – lined with parchment paper)
- Bench scraper or knife
- Kitchen scale (optional)
It’s best to use a stand mixer that comes with a bowl using the hook attachment. It makes the initial mixing process easy and I can clean up or start preheating the oven while it’s mixing.
The stand mixer I’ve suggested is the best mixer I’ve ever used. I had to sell it before moving to the Philippines because of voltage differences. I miss it and think about it often (matte black, pro-line, 7 quart, with a bowl-lift…ahh), but I have a new stand mixer that I use here which is a fraction of the price. It’s definitely not the same, not as powerful, and the attachments aren’t as durable, but I’m still very thankful for it because it makes my life easier as opposed to the old fashioned way of kneading by hand.
I already checked its availability in the US and my current one isn’t for sale, but I have found a similar stand mixer based on price, settings, and attachments. I’ve shared it here if this stand mixer is more in your price point. I have not used this specific brand, but it has great reviews and seems on par with the one I purchased here in the Philippines. The one I have looks almost identical and again, you really can’t beat the price.
If you don’t have a stand mixer, please read the recipe notes for instructions on how to make the dough for these sub sandwich rolls by using a bowl and wooden spoon, then kneading the dough by hand on a lightly floured surface.
Ingredients
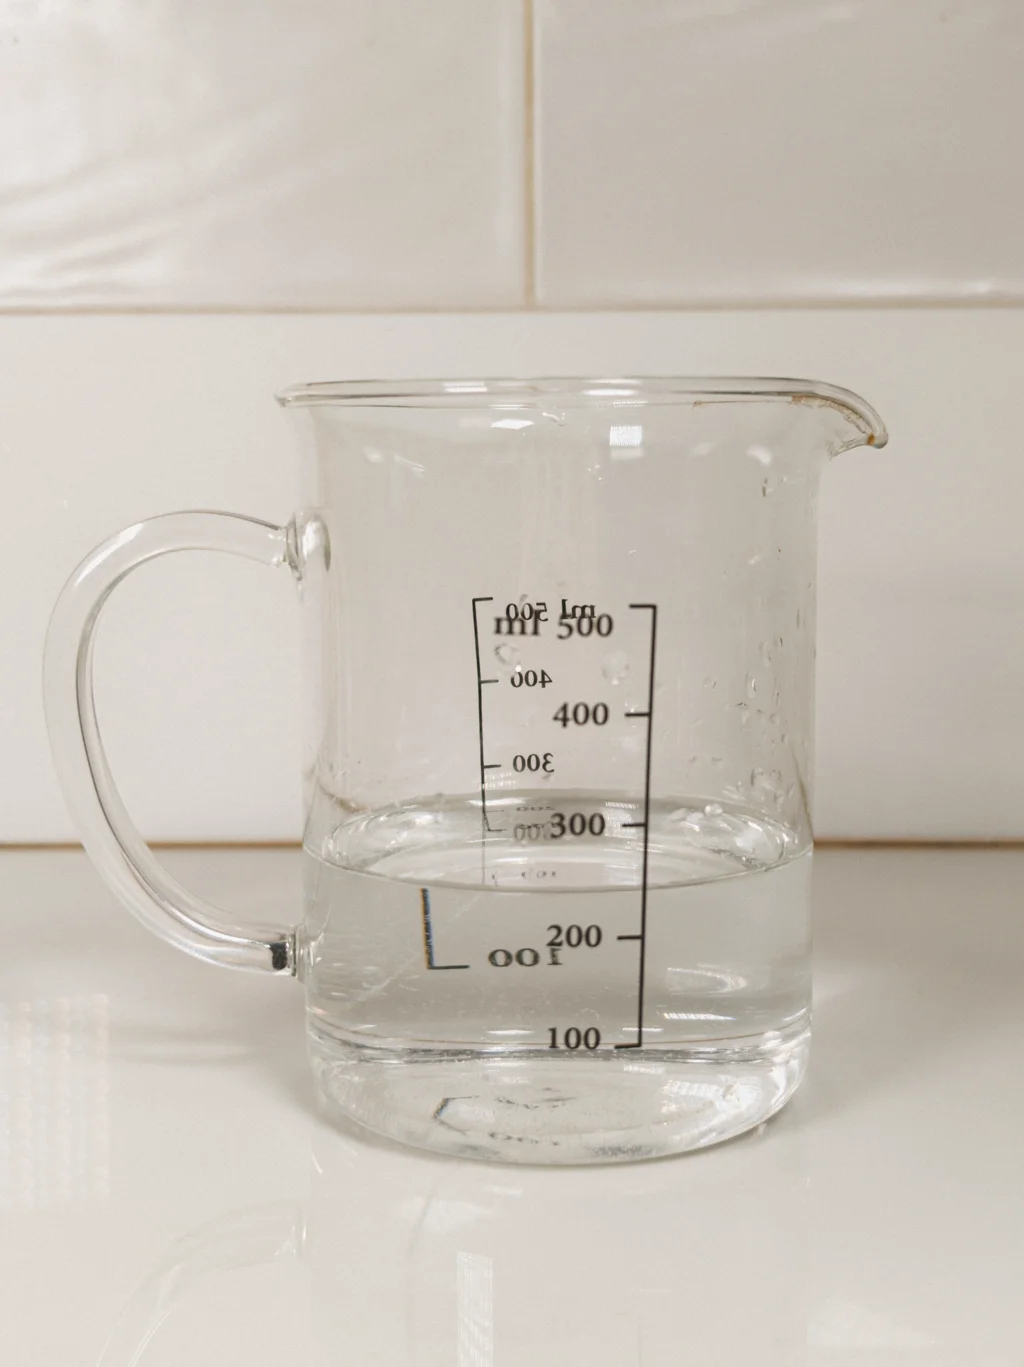
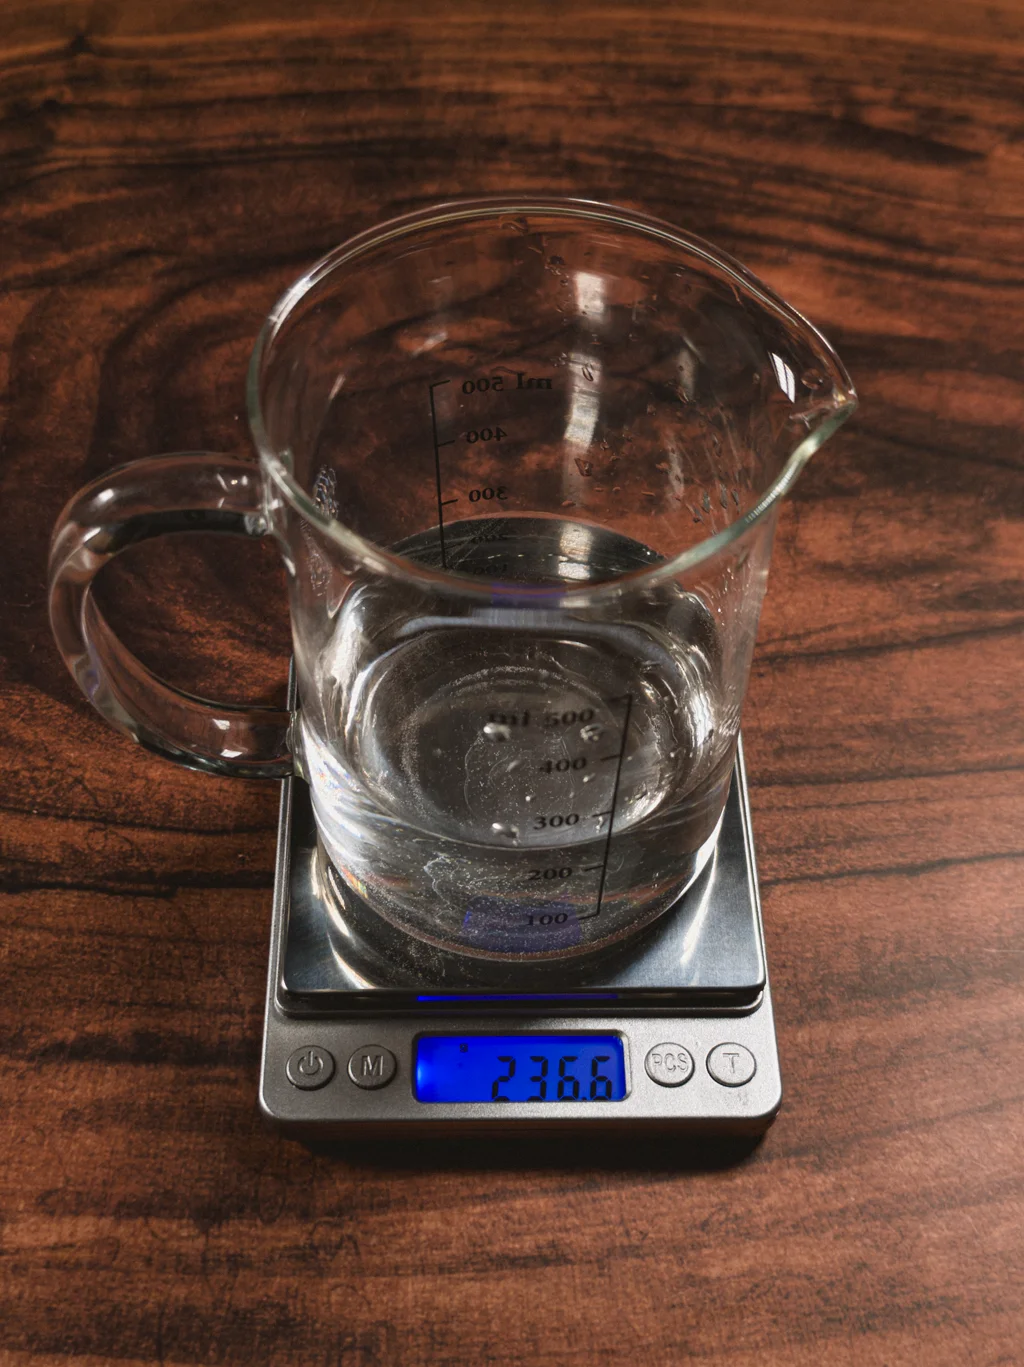
- 1 cup warm water (110°F – about 236g)
- 2 tbsp sugar (raw or refined – about 30g)
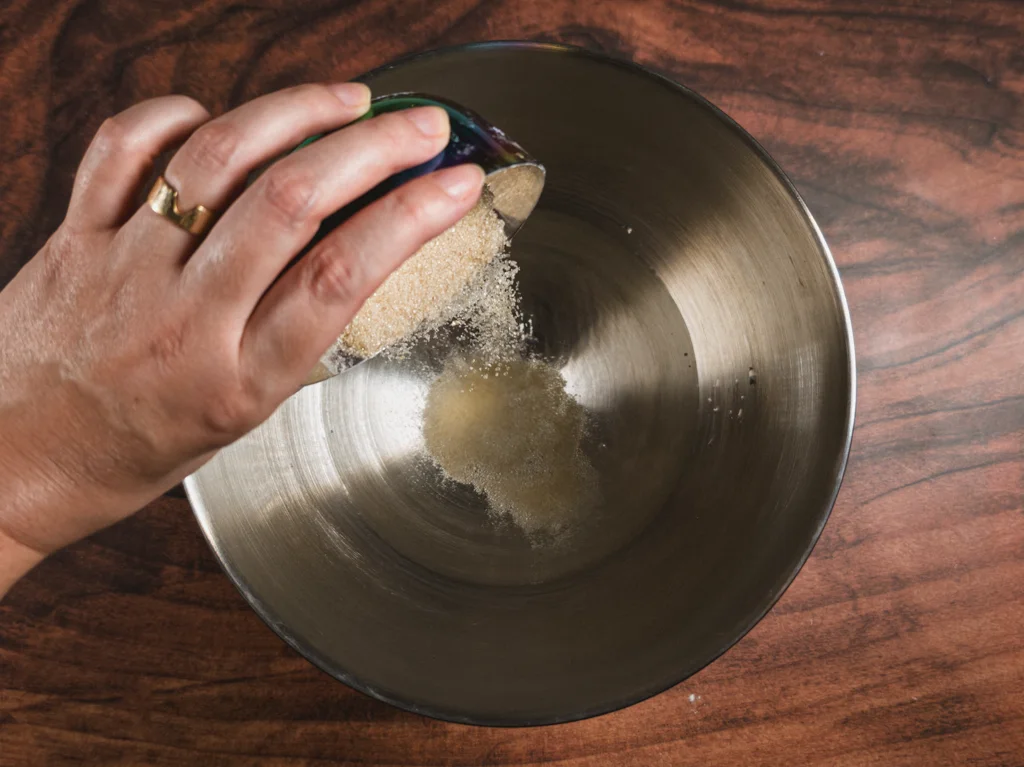
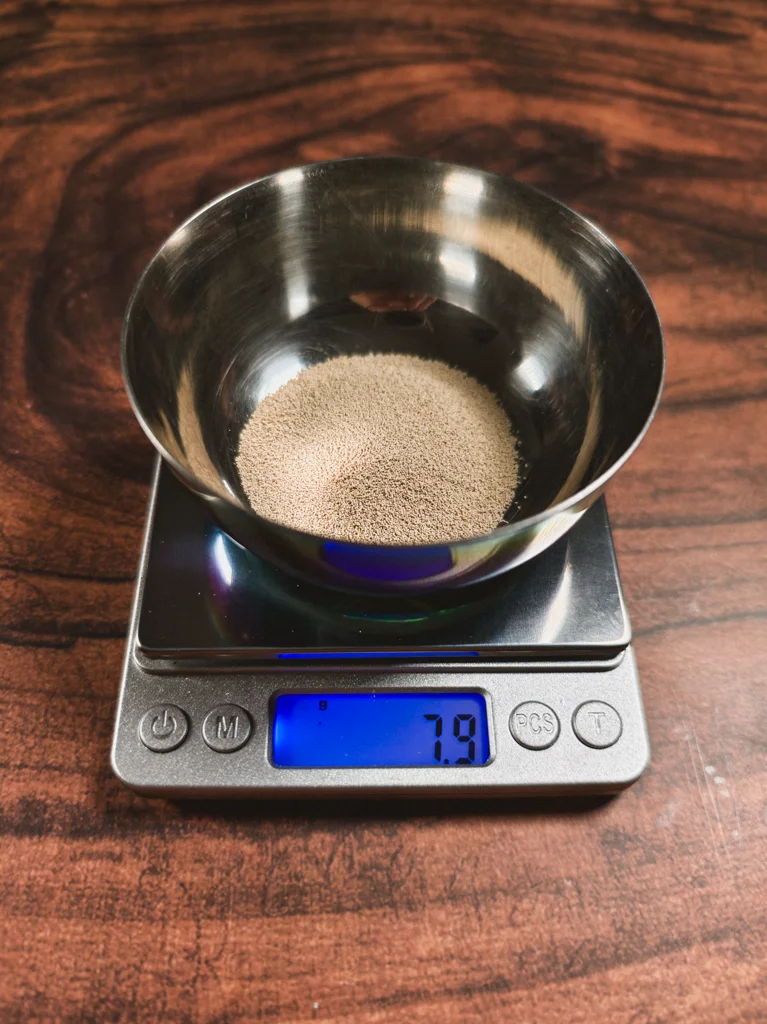
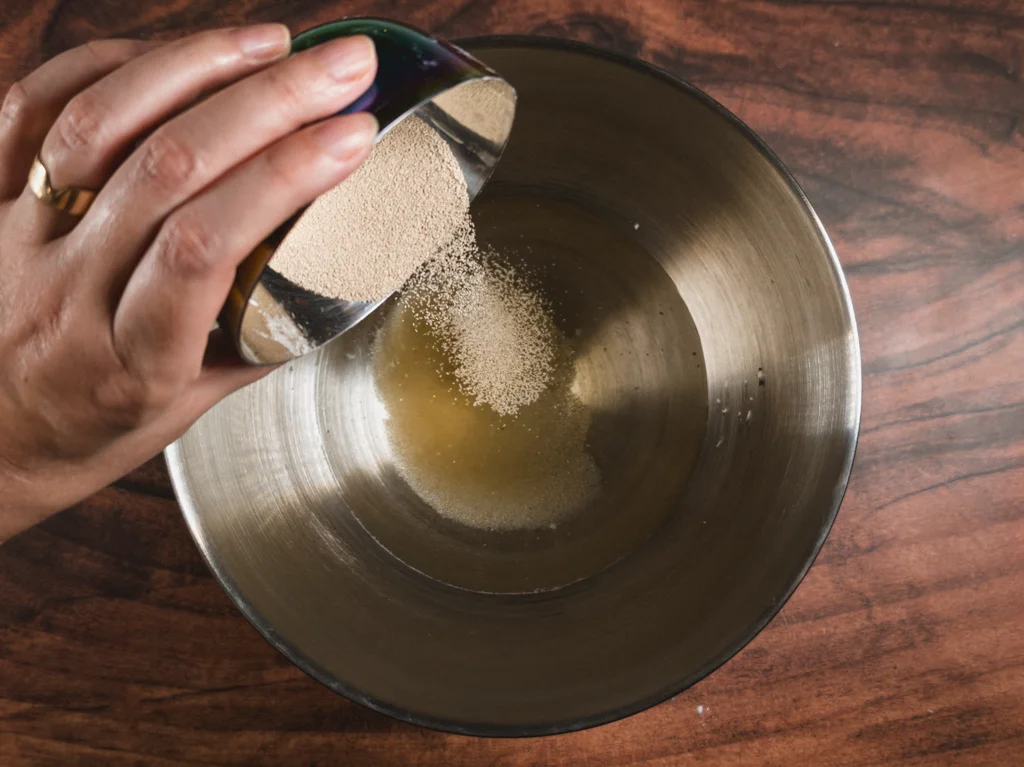
- 2 tsp instant yeast (about 8g)
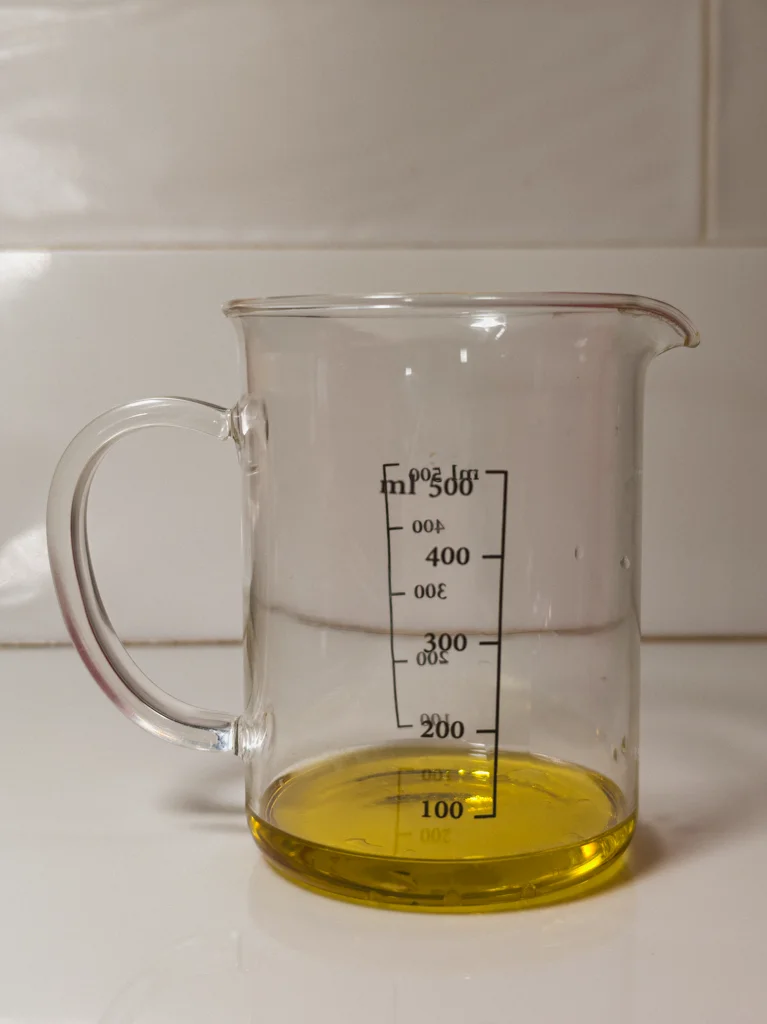
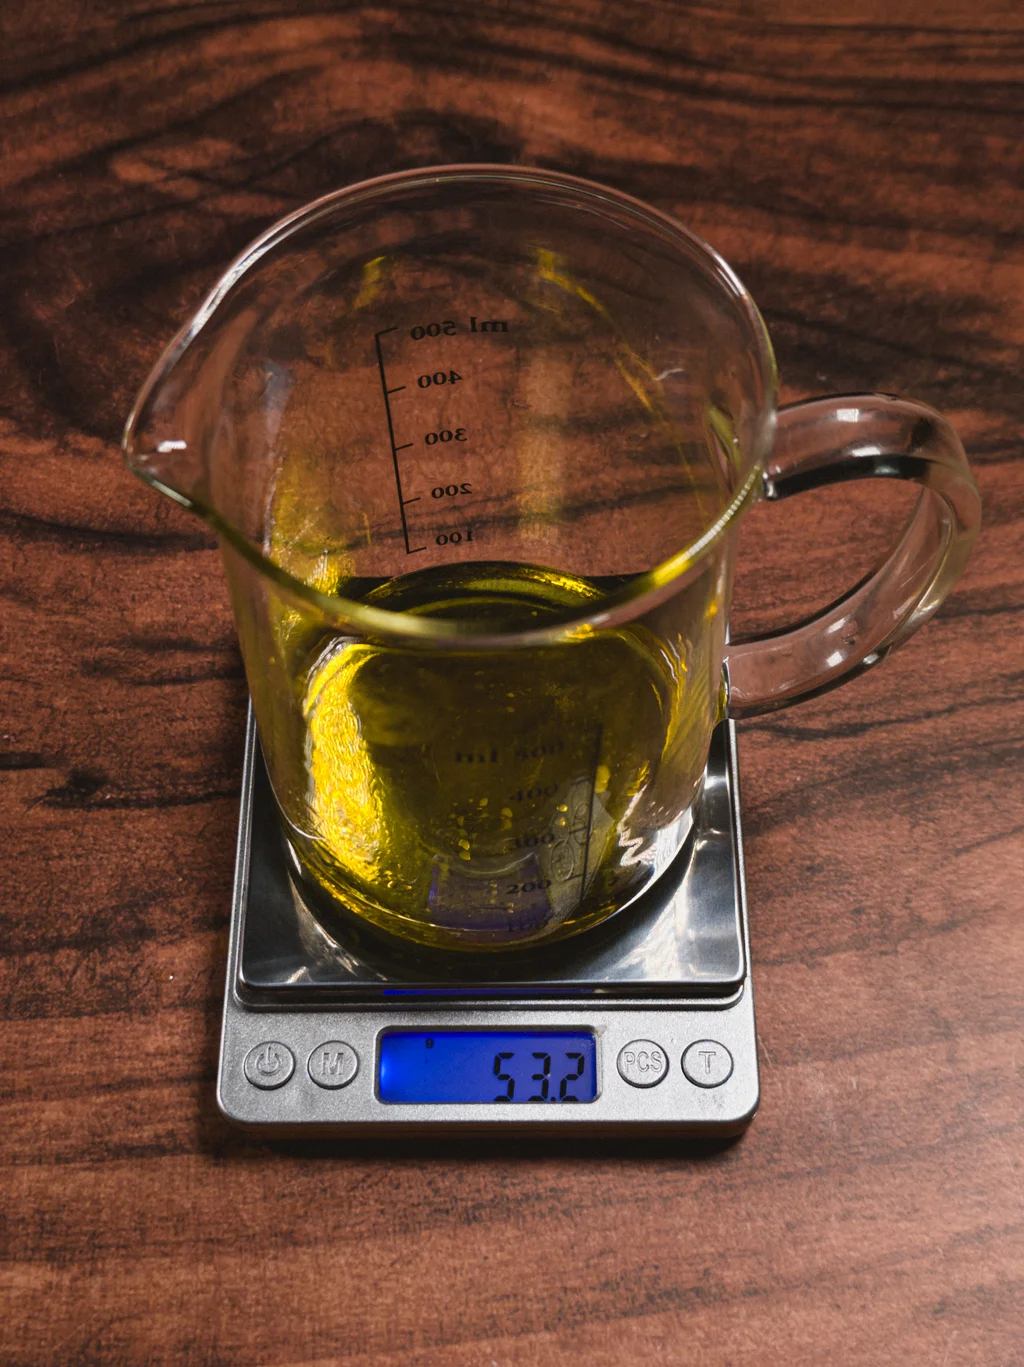
- ¼ cup olive oil (extra virgin – about 53g)
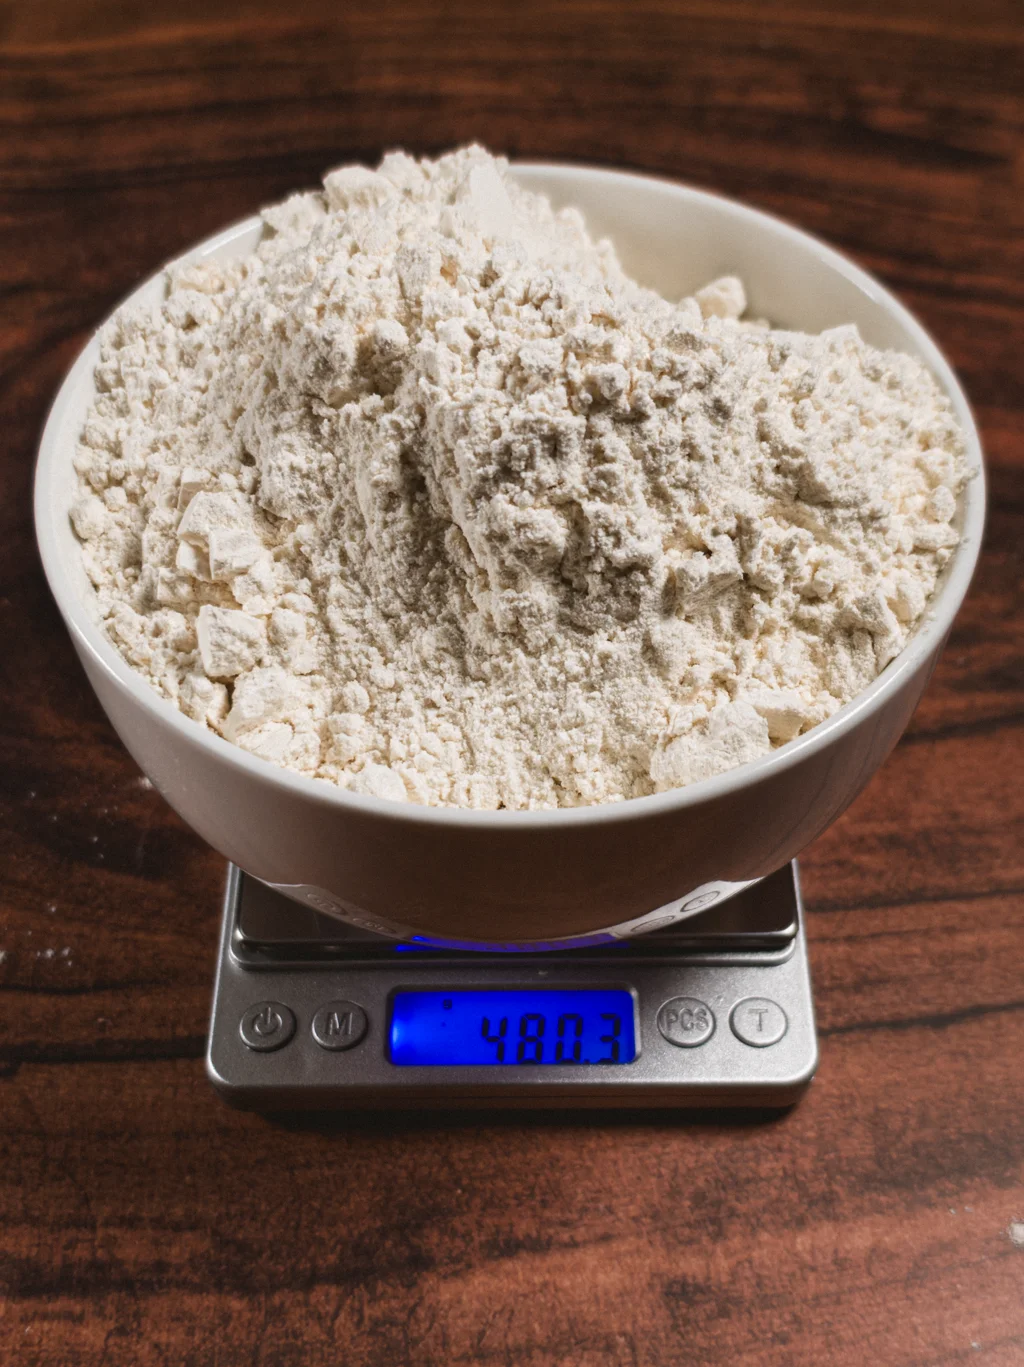
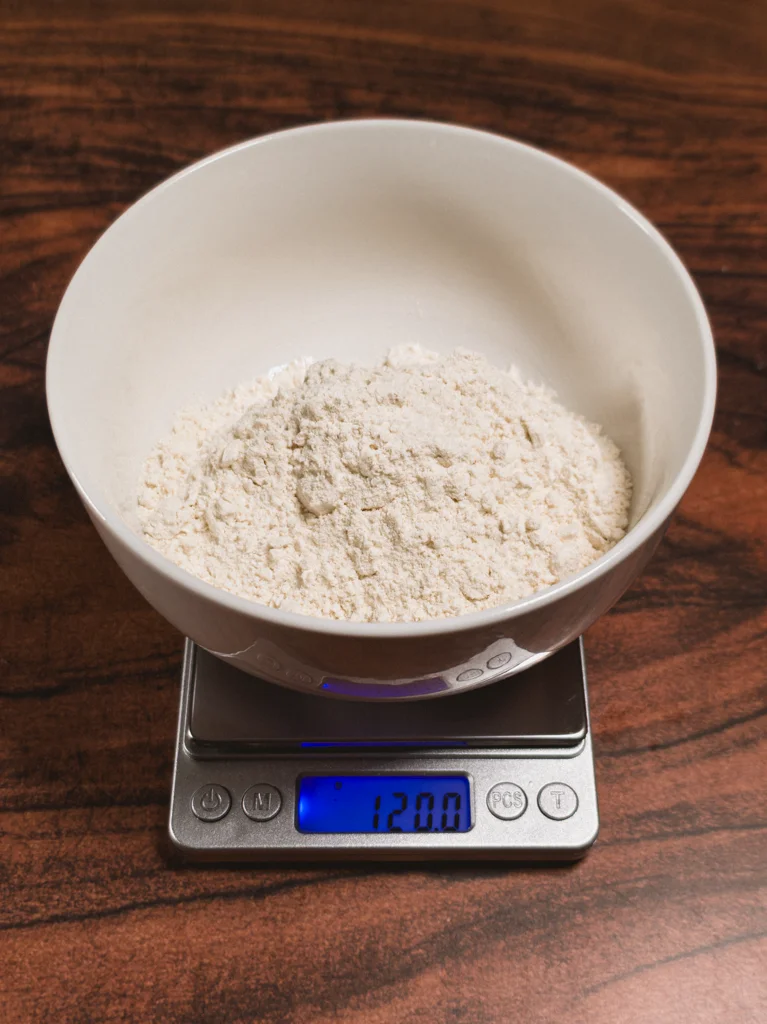
- 4 cups flour (all-purpose or bread flour – about 480g)
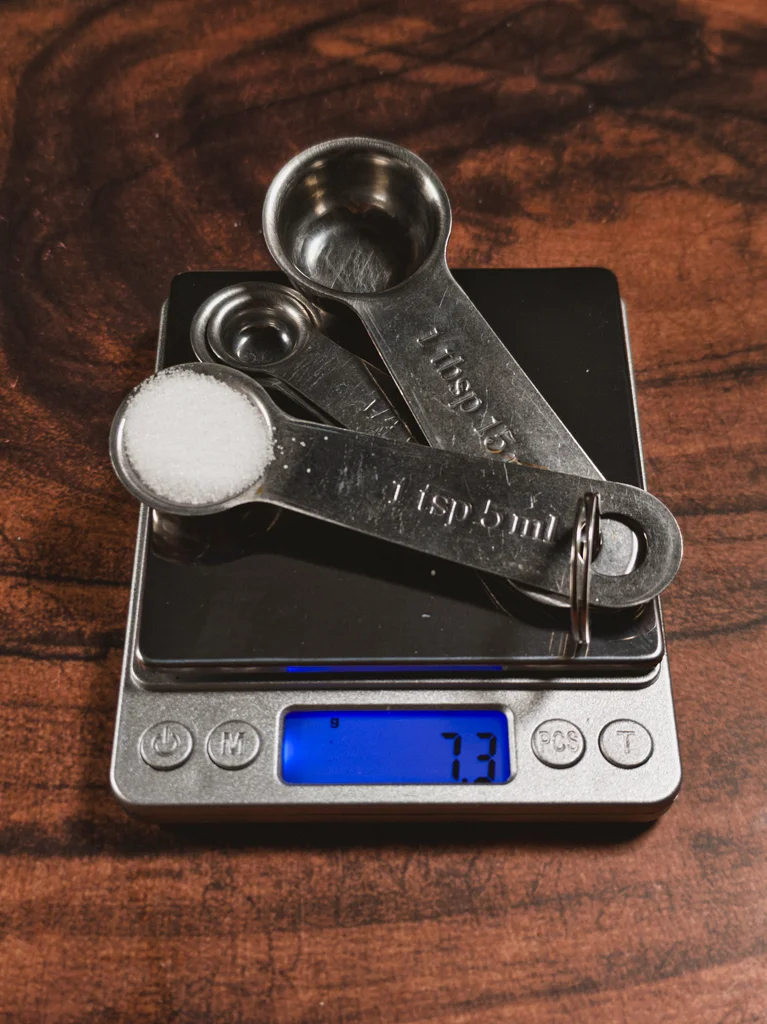
- 1 tsp salt (about 7g)
- 2-4 tbsp melted butter (for tops – optional for vegan)
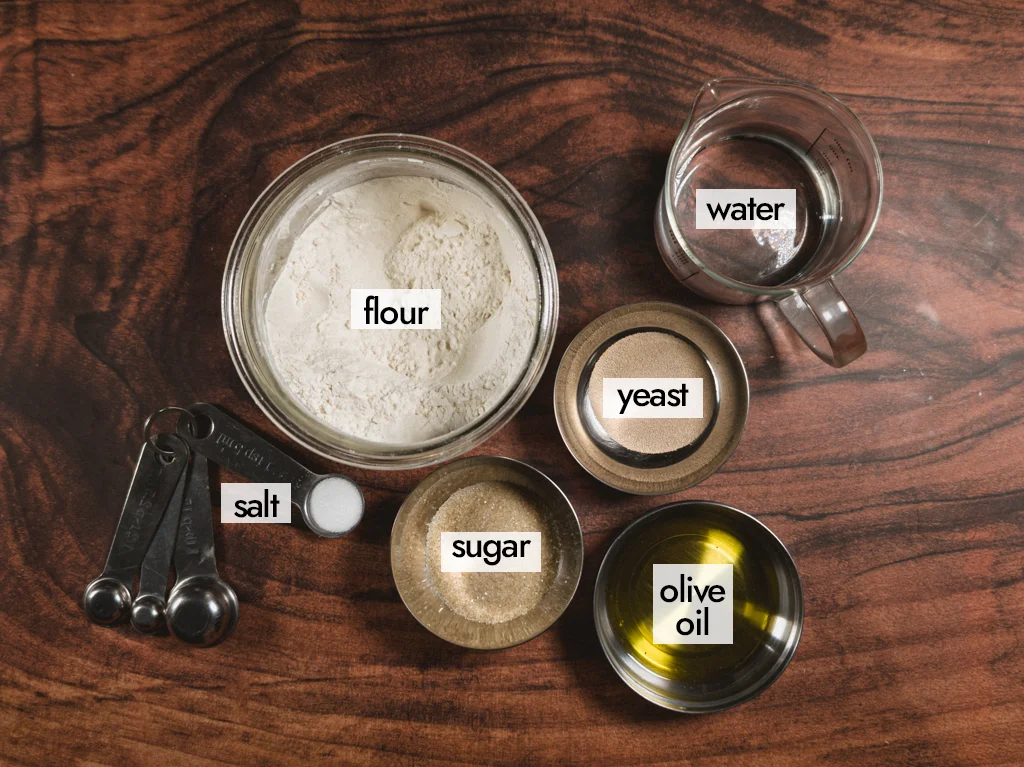
Very minimal ingredients are used to make the dough for sub sandwich rolls. I feel good knowing that everything going into making this bread consists of all basic ingredients.
Instructions

Step 1
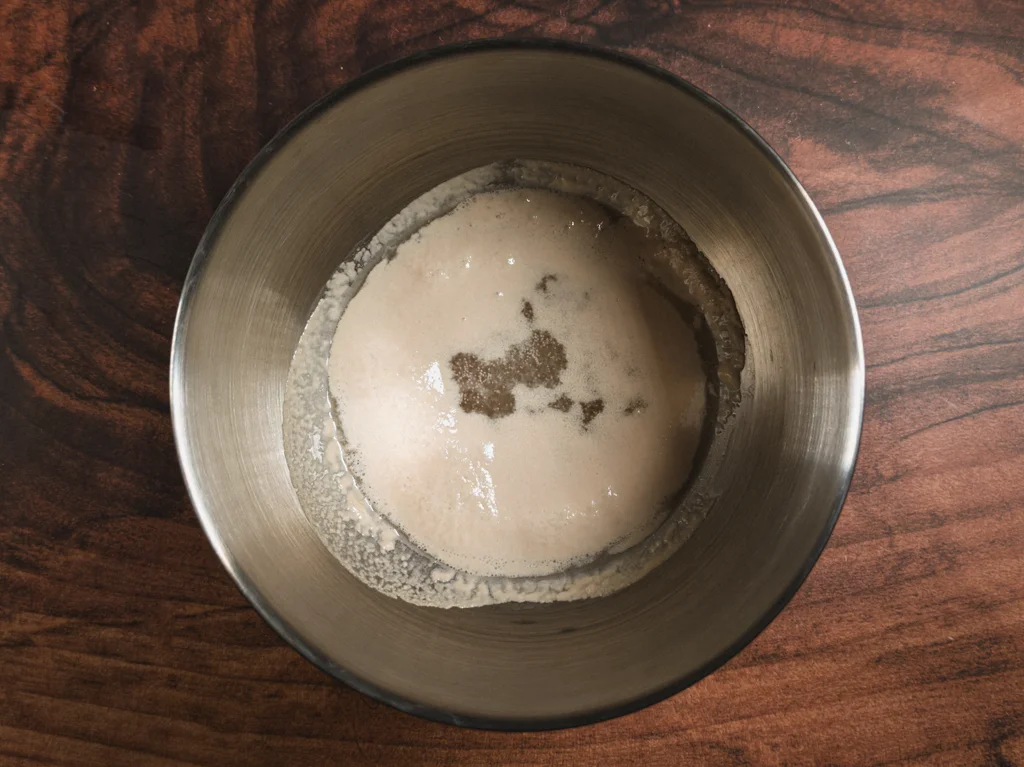
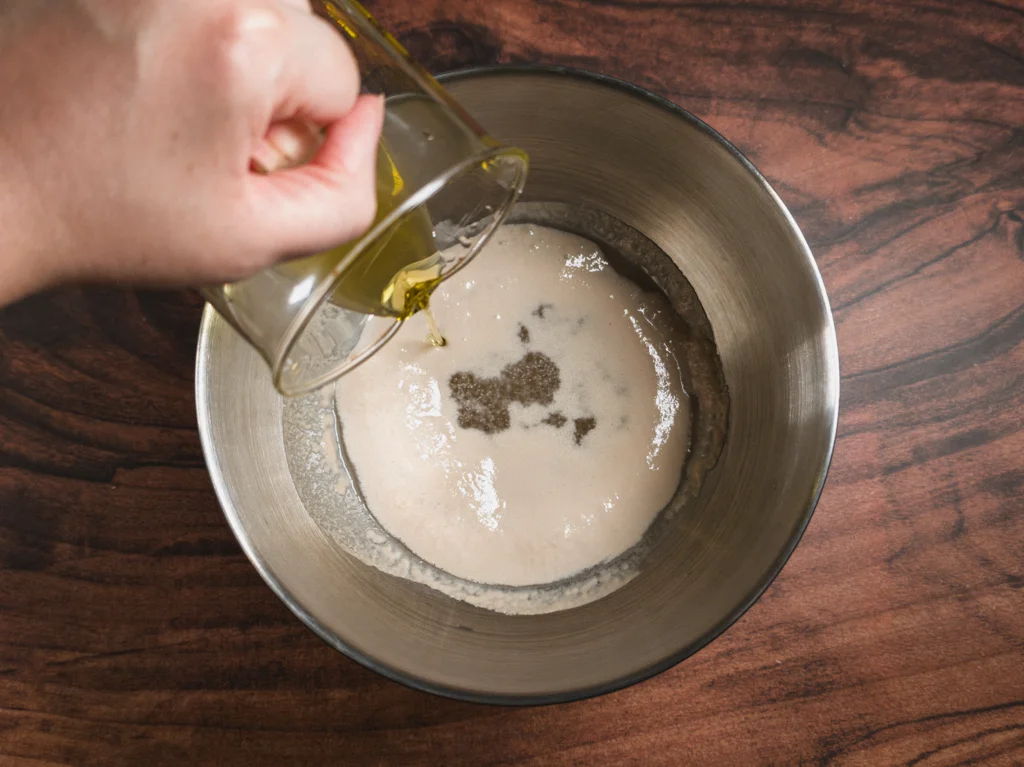
Combine 1 cup water (about 236g), 2 tbsp sugar (about 30g), and 2 tsp yeast (about 8g) in a stand mixer bowl. Allow the yeast to activate in the bowl for 10 minutes. Yeast will begin to foam.

Step 2
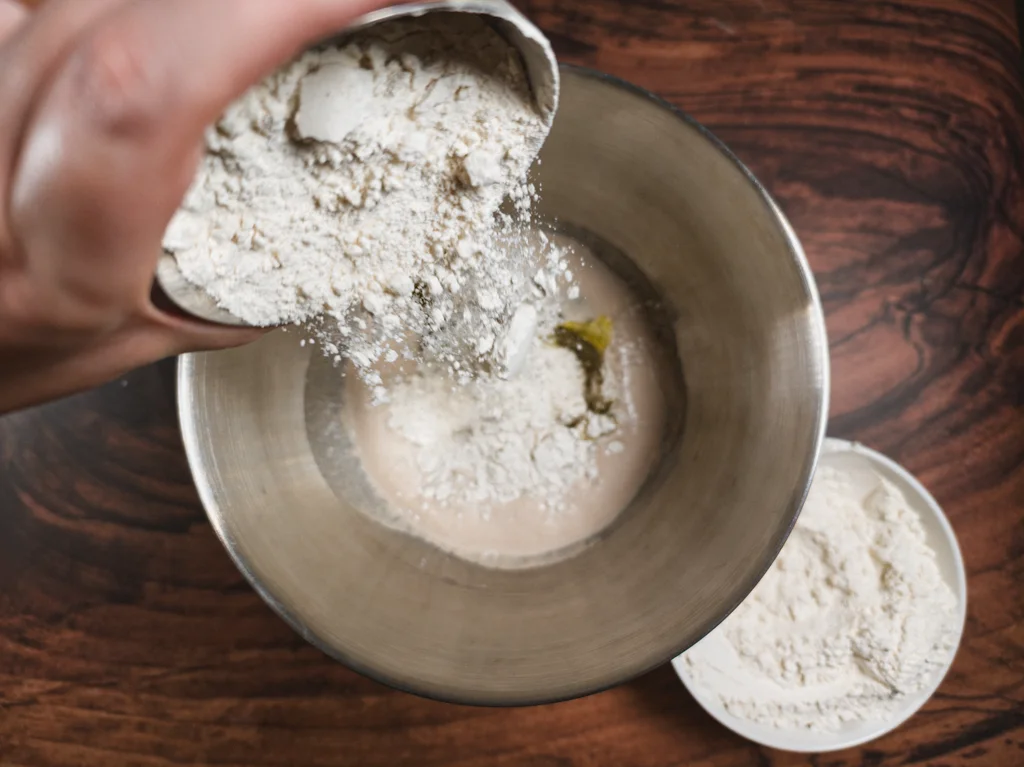
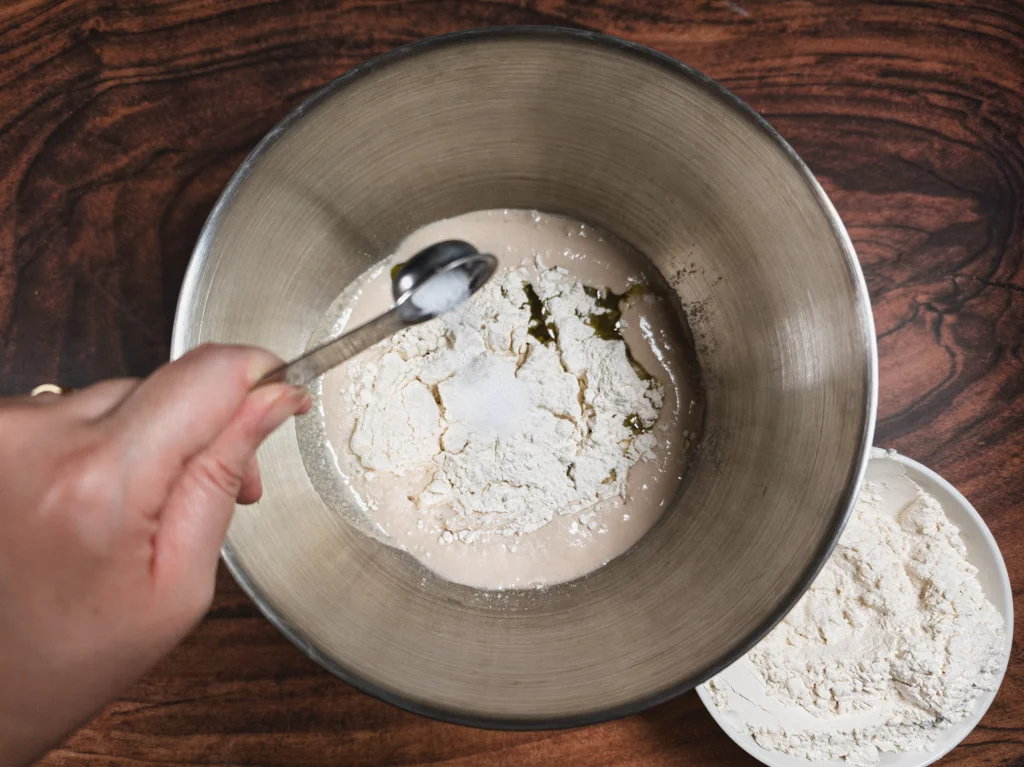
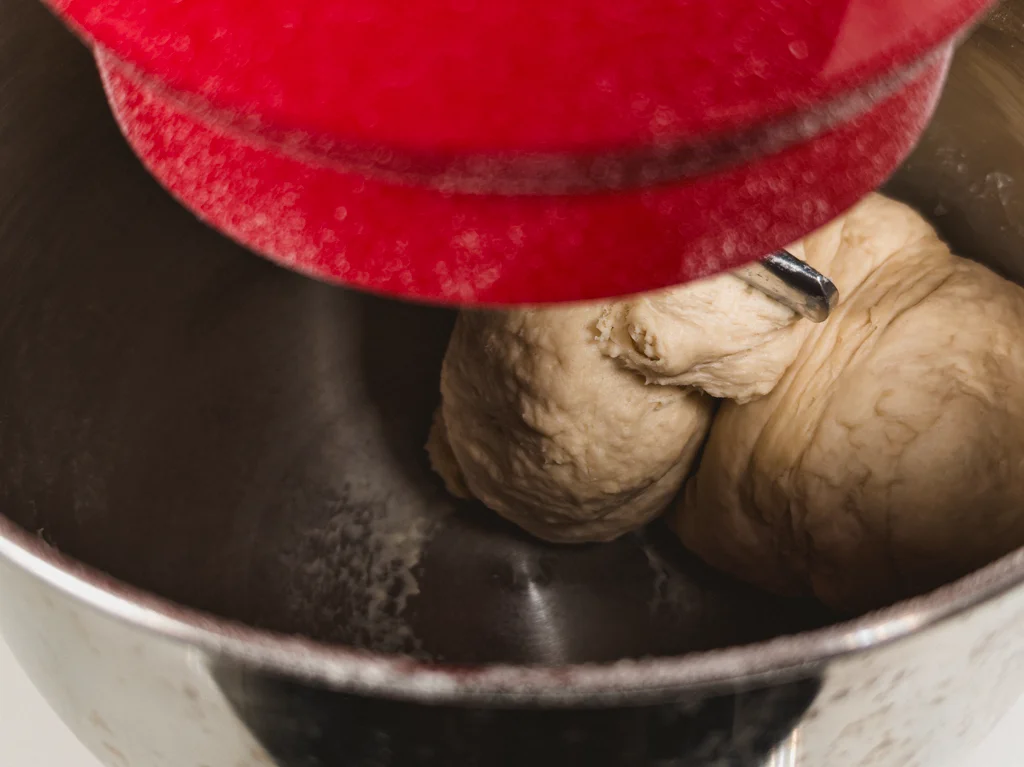
The 4 cups flour (about 480g) will be added gradually throughout the next few steps, as directed. Add ¼ cup olive oil (about 53g), 2 cups flour (about 240g), and then 1 tsp salt (about 7g) on top of the flour, into the bowl. Mix the ingredients with the hook attachment on a stand mixer using the lowest setting. Mix for 3 minutes.
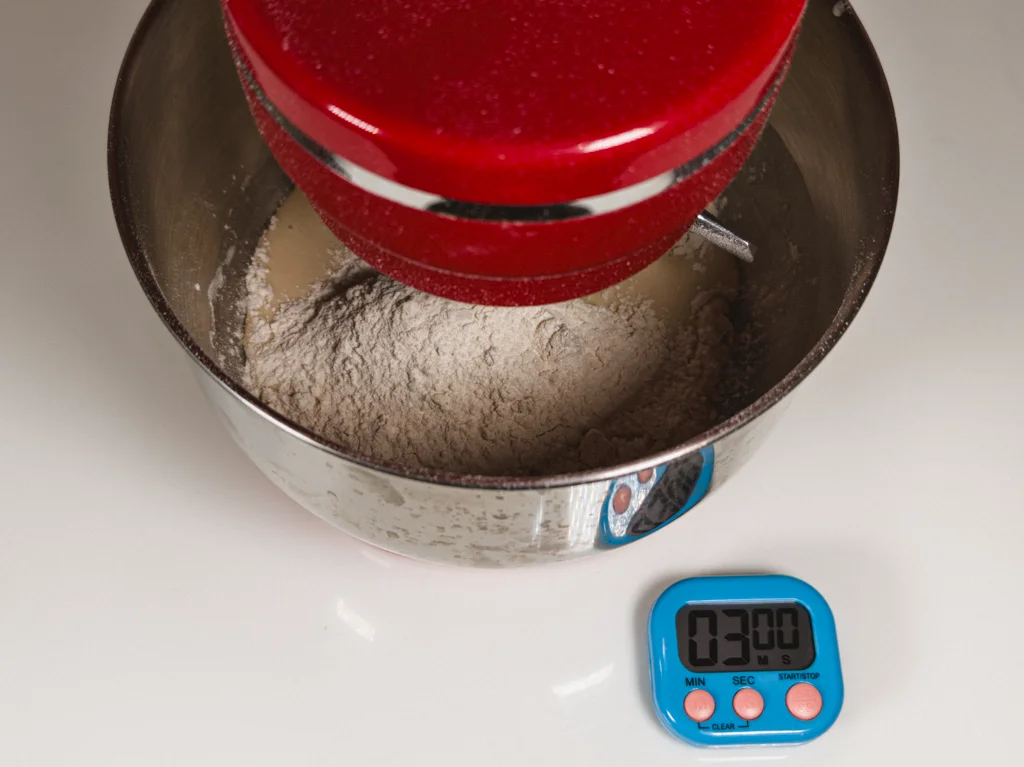
Step 3
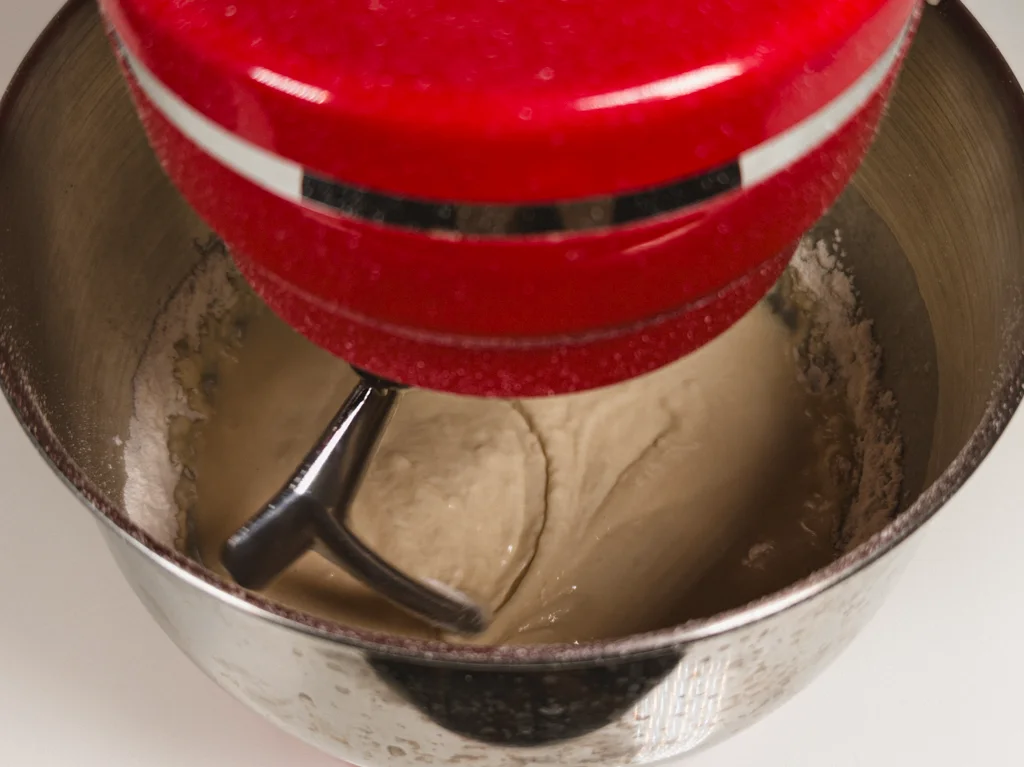
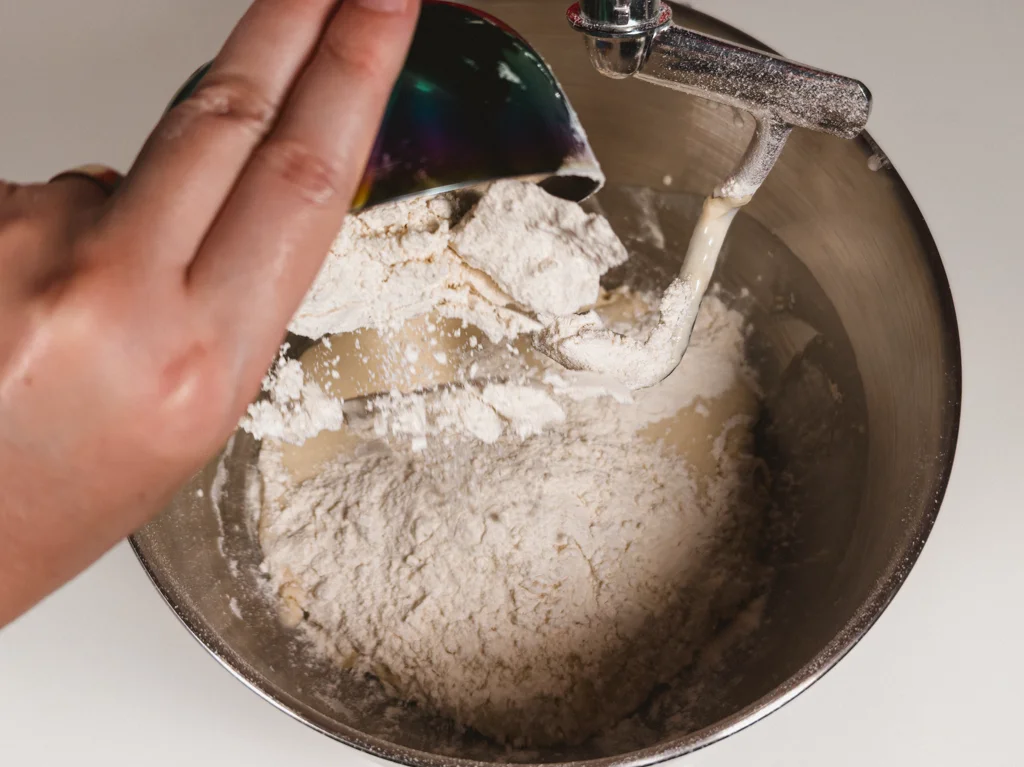
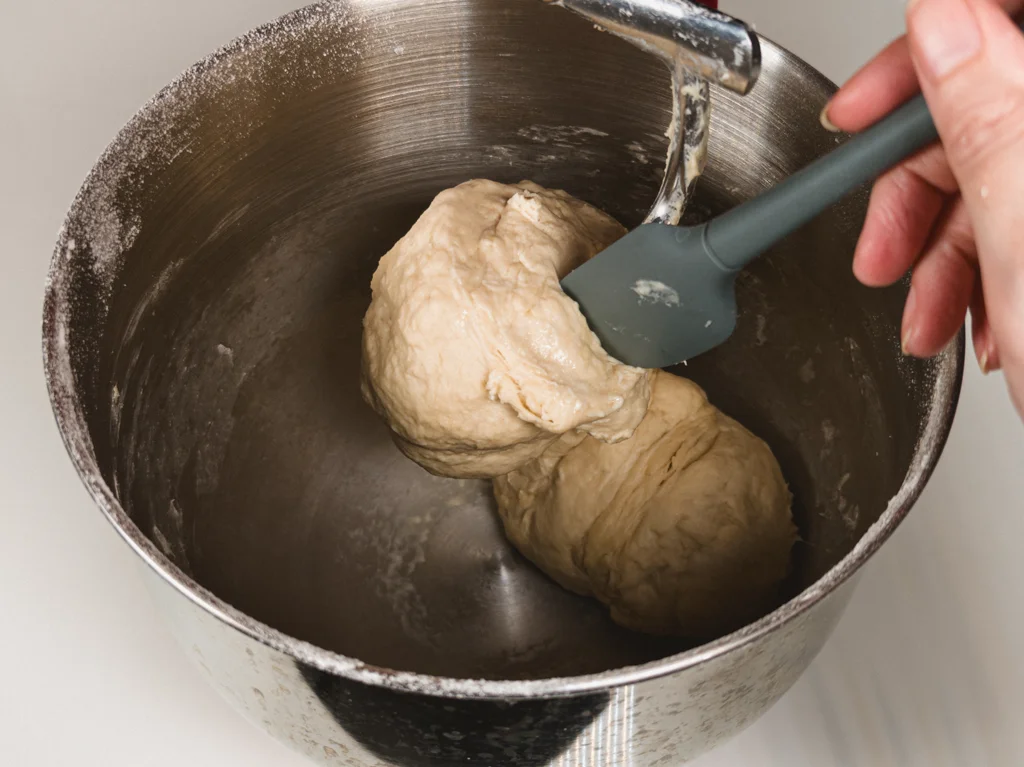
Scrape down the sides with a spatula if needed. Add the third cup of flour (about 120g) and continue to mix on low for another 3 minutes. A soft dough ball will begin to form.
Step 4
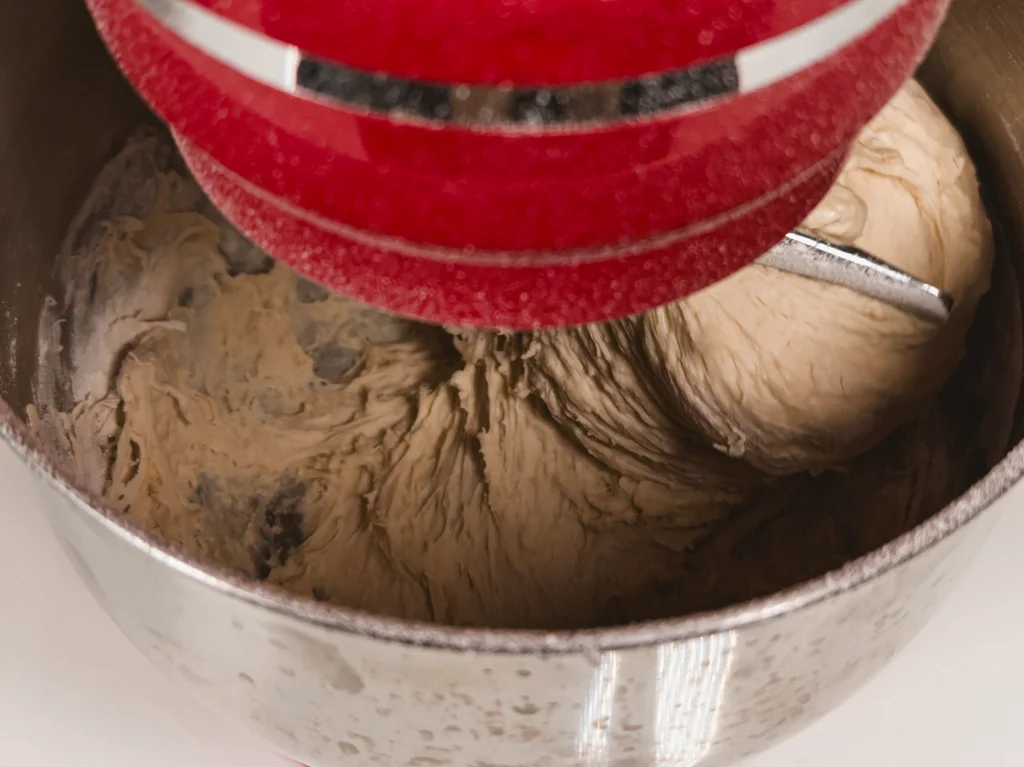
Add the remaining cup of flour (about 120g) to the dough and continue to mix on low for another 3 minutes or until the dough is soft but not sticking to the sides of the bowl.
*If refrigerating or freezing the dough to be used for later, skip step 5, the proofing step. Please see additional storage instructions in the How to Store section.

Step 5
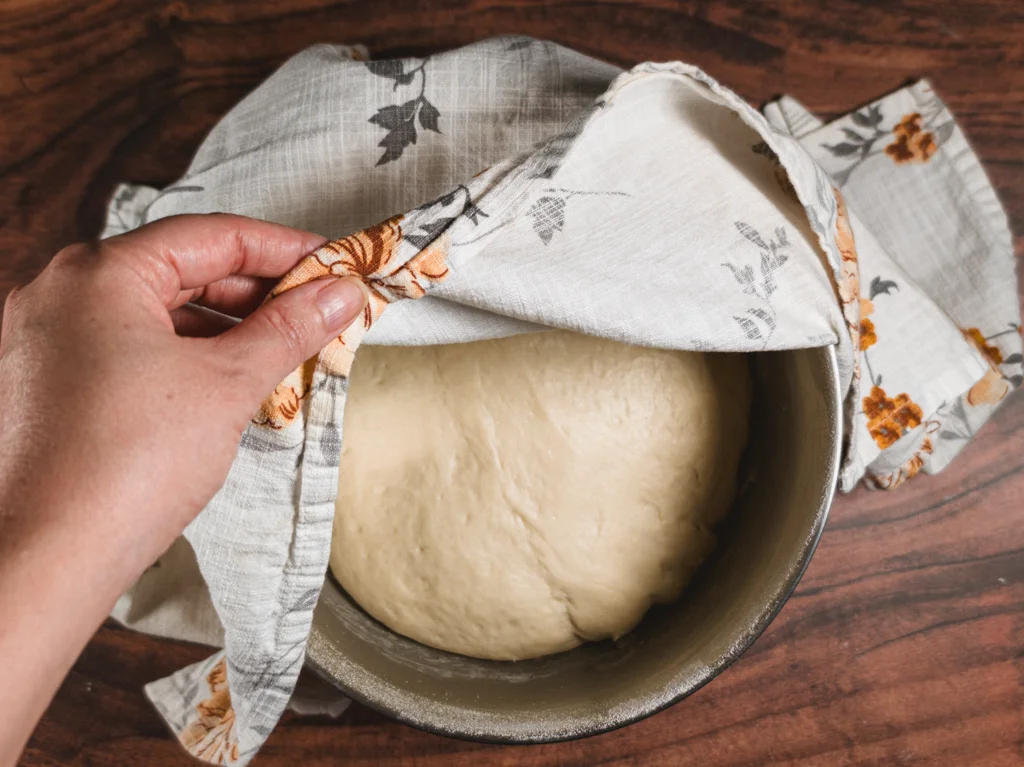
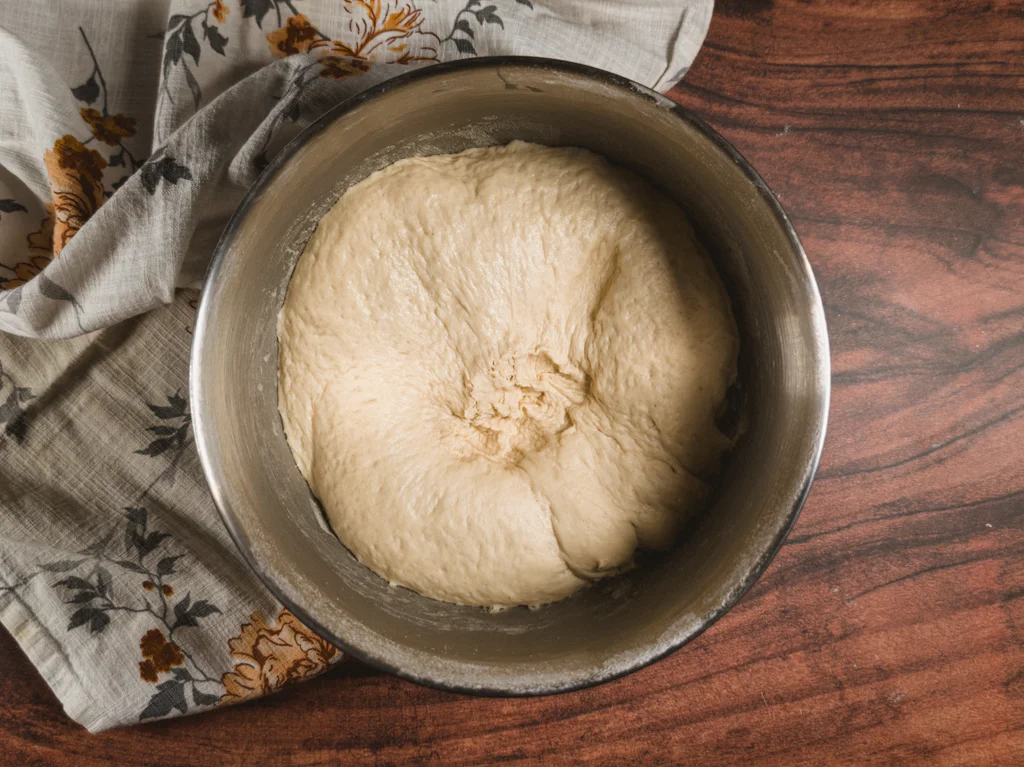
Remove the bowl from the stand mixer and cover with a kitchen towel. Allow the dough to rise for 30 minutes in a warm spot.

Step 6
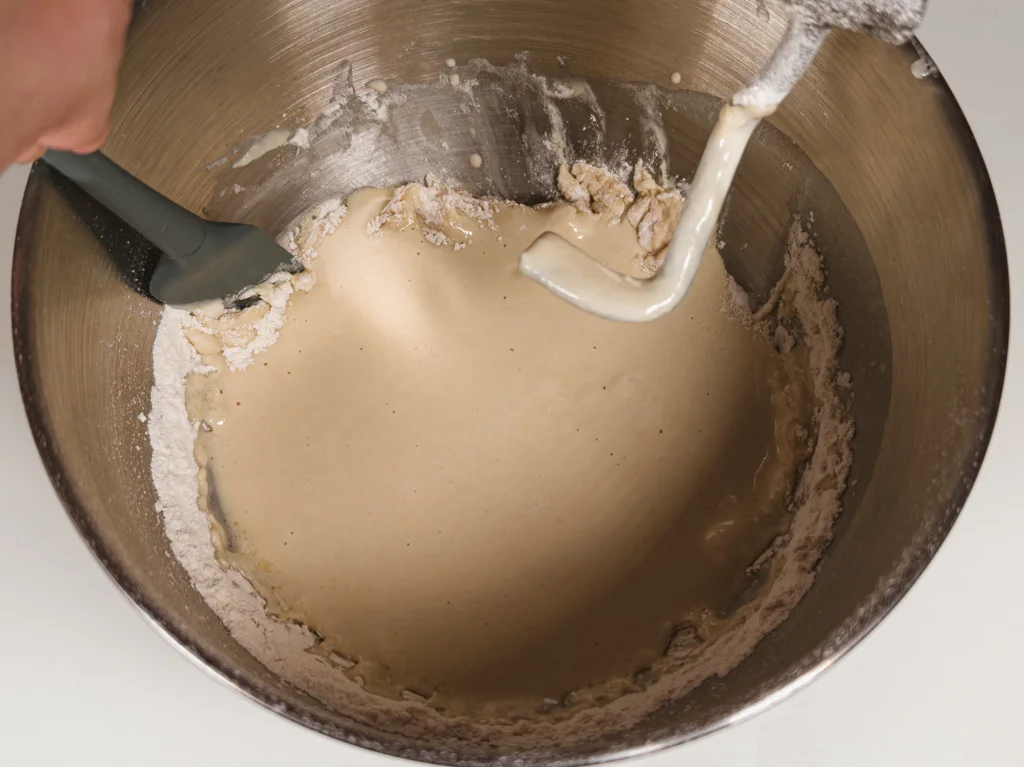
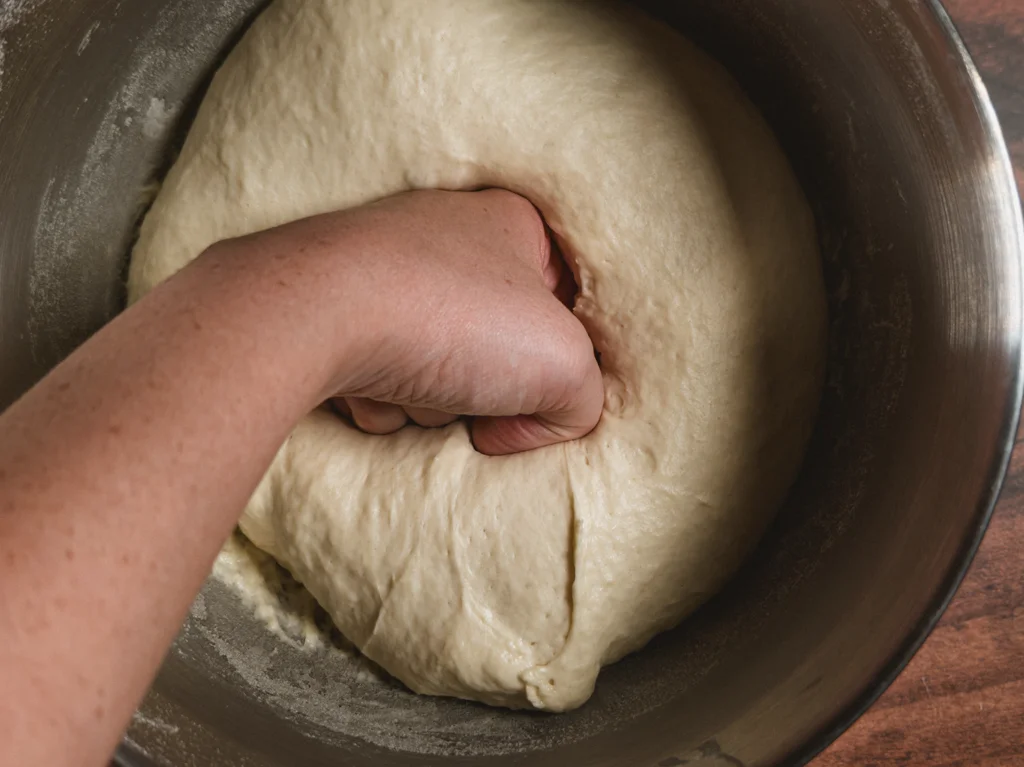
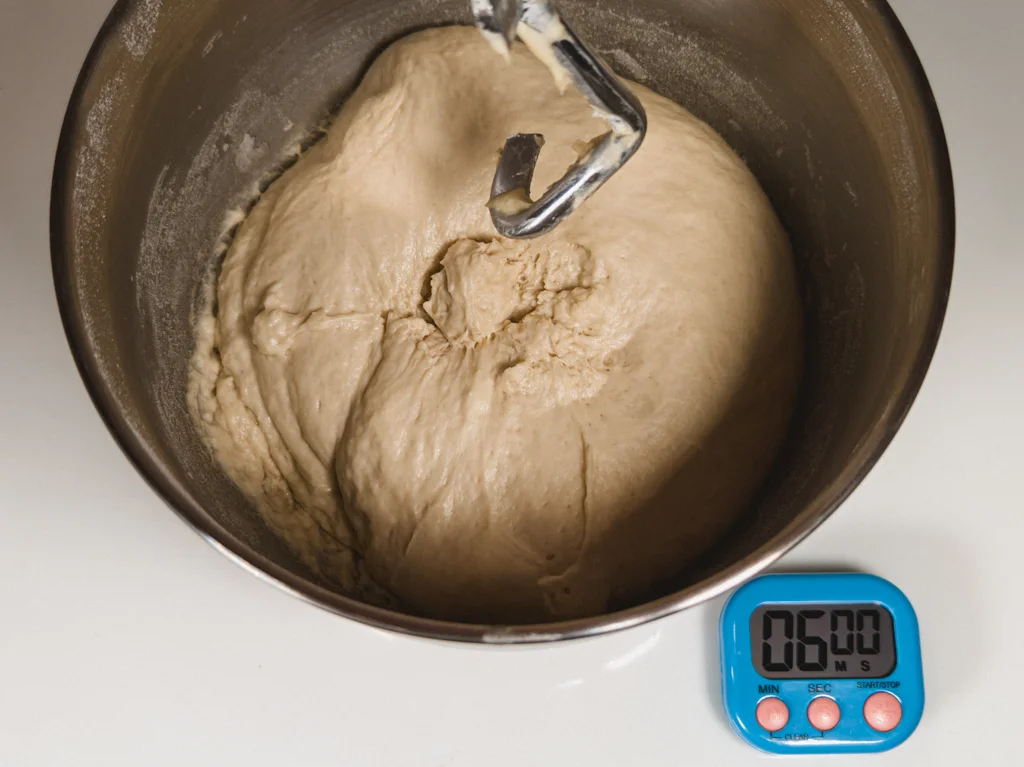
Once the dough has doubled in size, gently punch down the dough to release any built up air. Return the bowl to the stand mixer and mix on low for 6 minutes.

Step 7
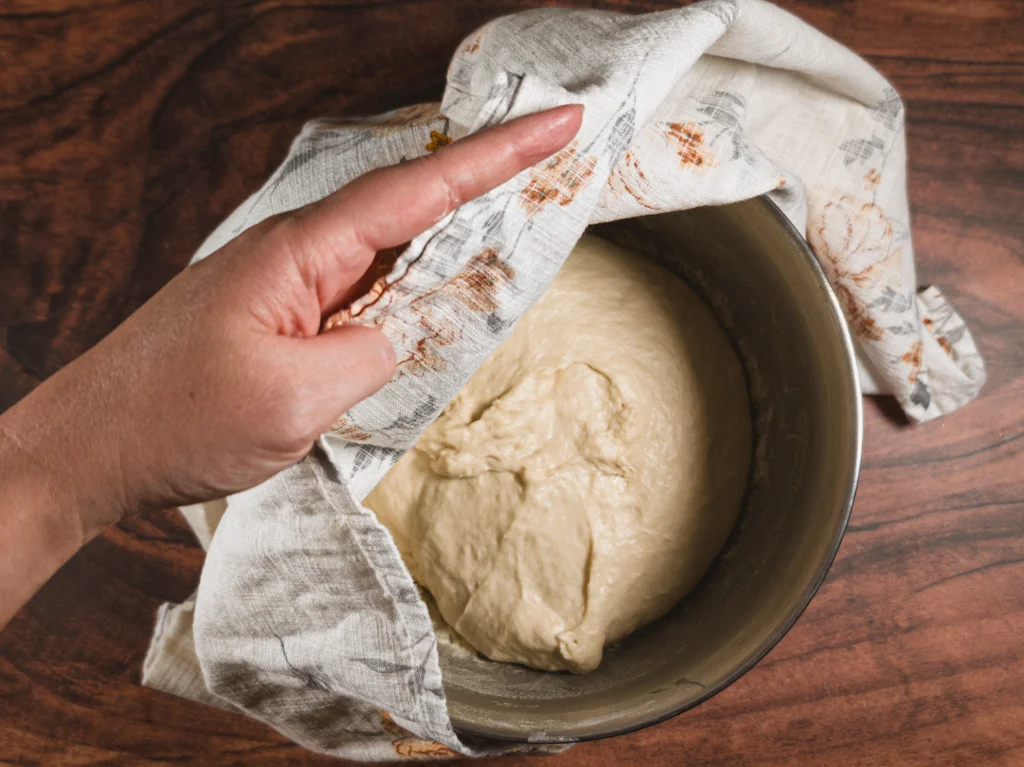
Remove the bowl from the stand mixer, cover with a kitchen towel and allow the dough to rise for another 30 minutes in a warm spot.
Step 8
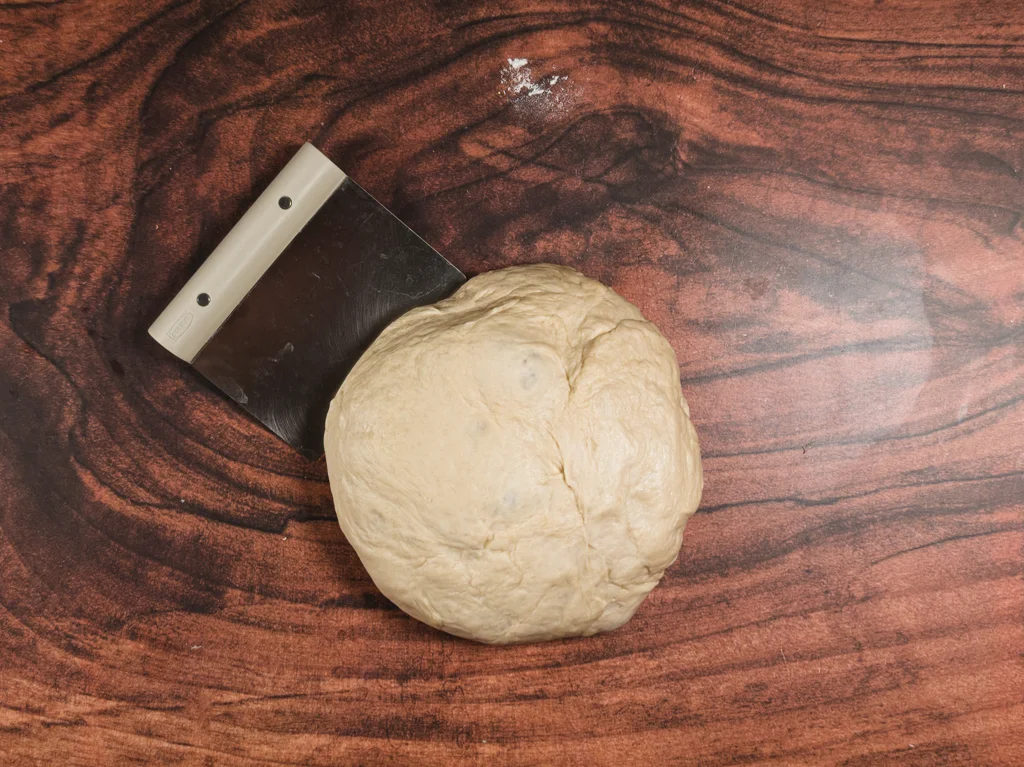
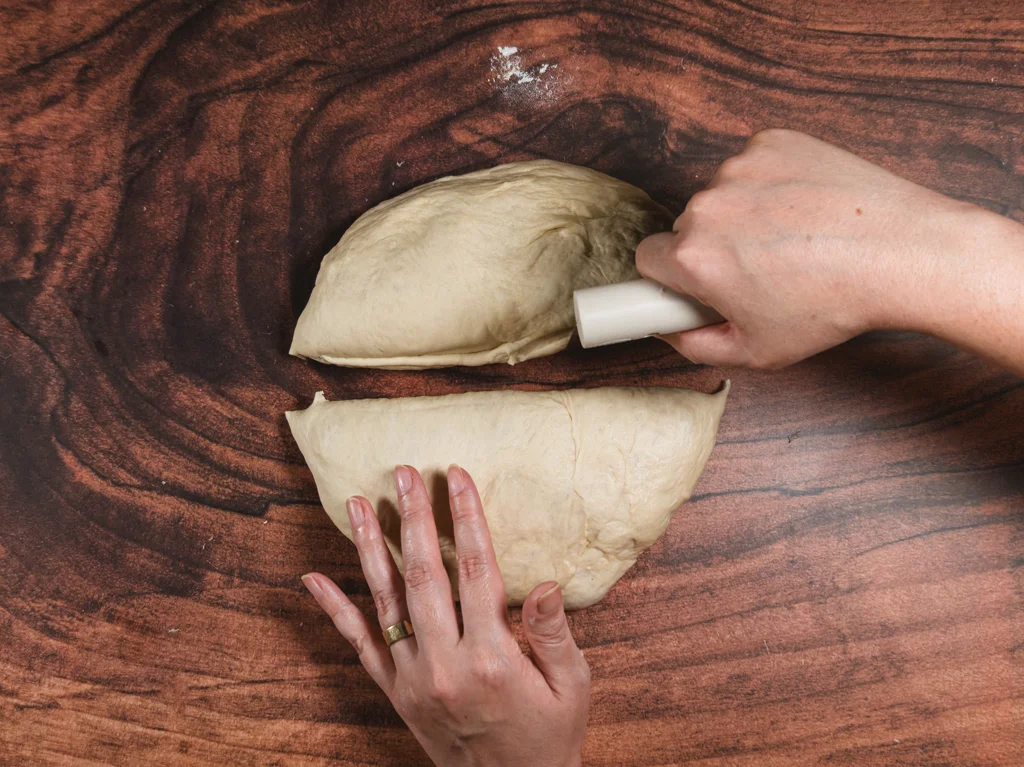
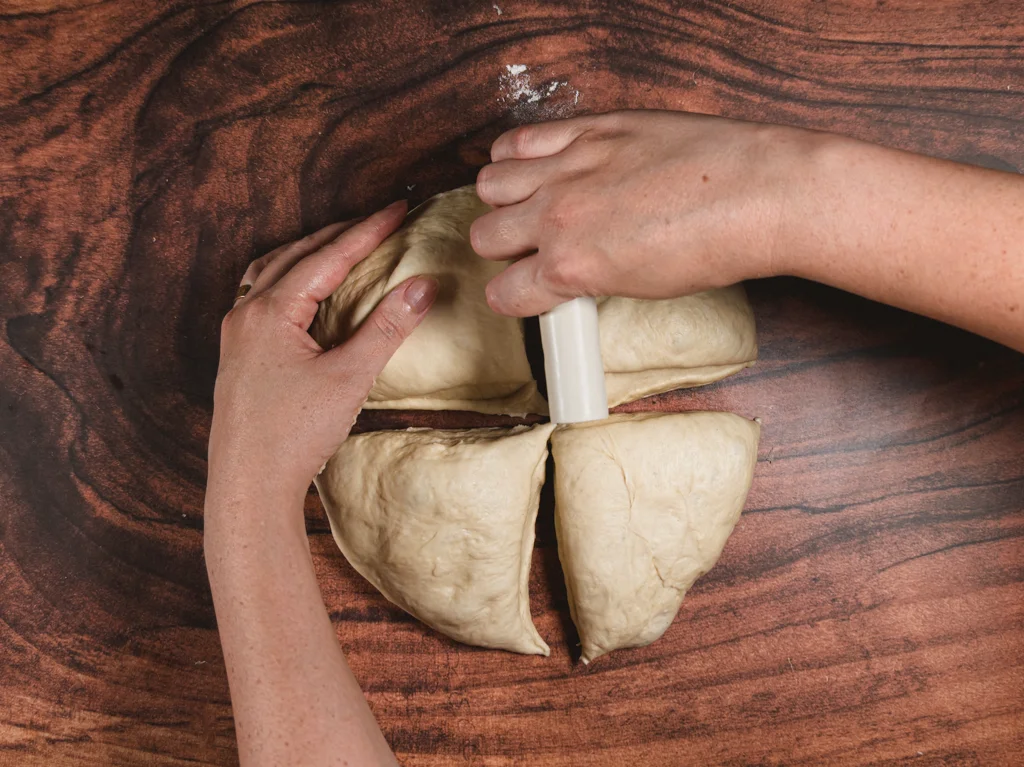
Once the dough has doubled in size, remove the dough from the bowl. Place on a clean, smooth surface and begin dividing the dough rolls by cutting the dough in half with a bench scraper or knife. Each half will be cut in half, creating 4 pieces of dough.

Step 9
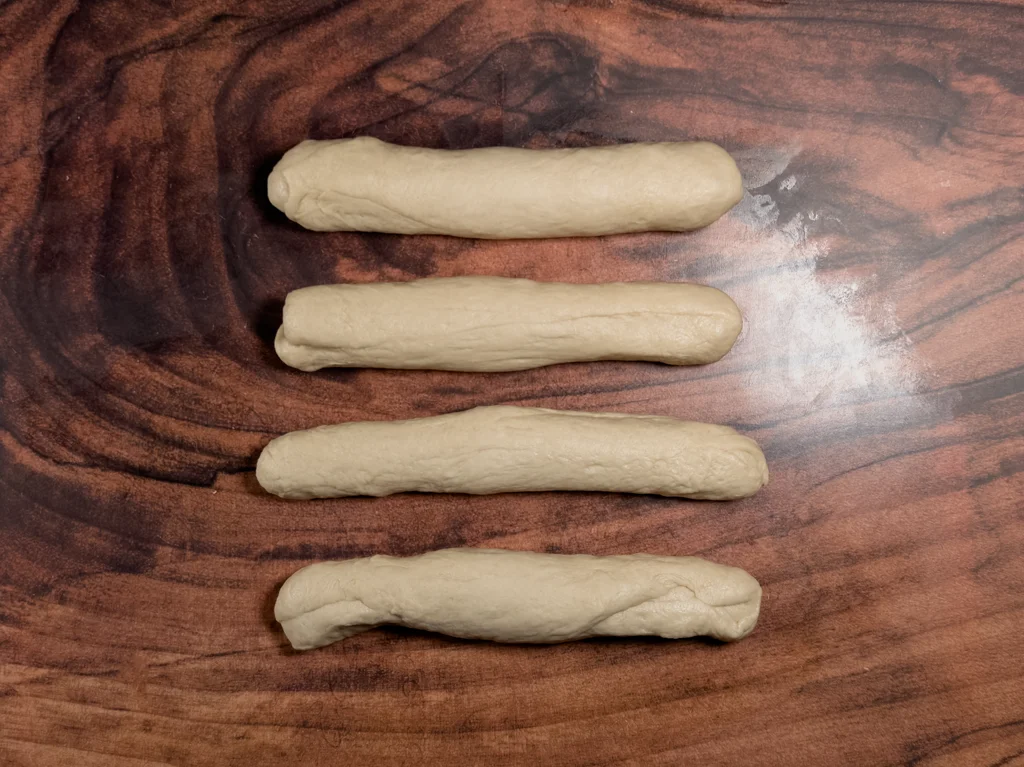
On a clean, smooth surface, roll each piece into a 9″ long loaf.

Step 10
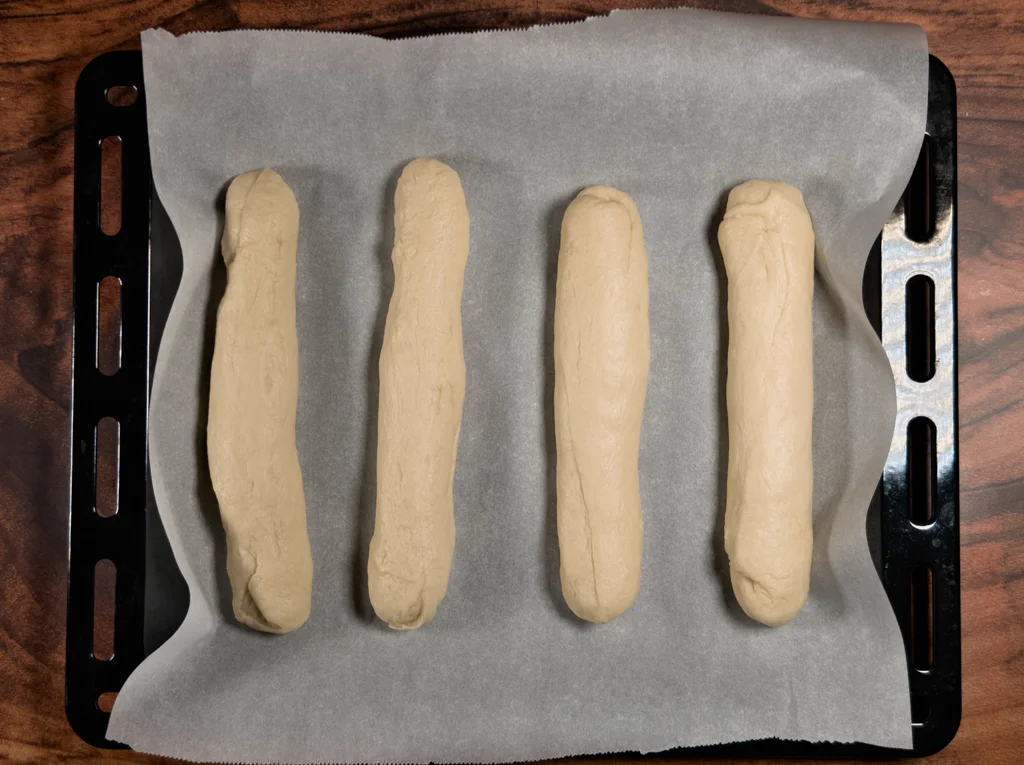
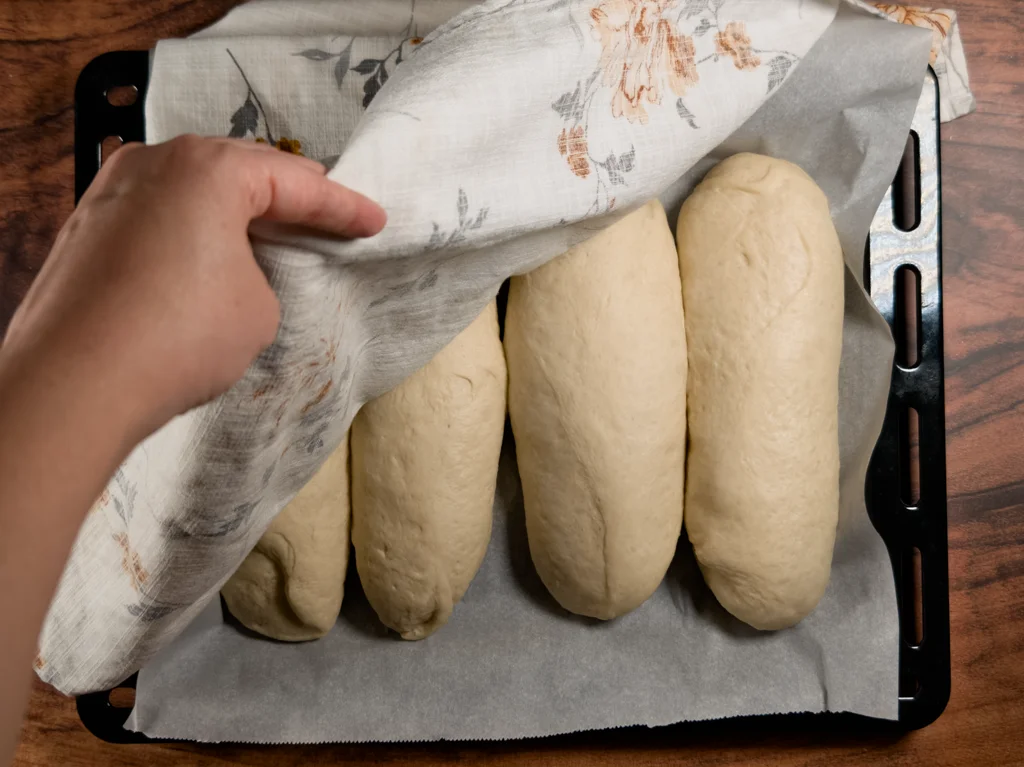
Place each roll on a baking sheet lined with parchment paper. Allow the loaves of dough to proof for 1 hour, covered, in a warm spot.
Step 11
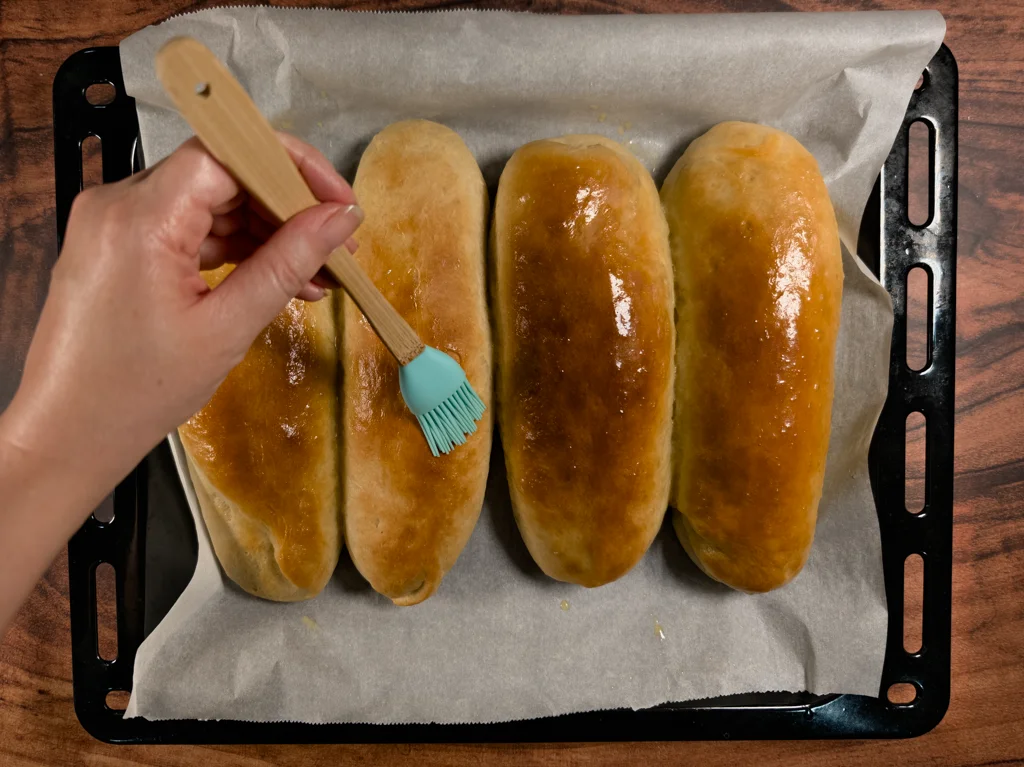
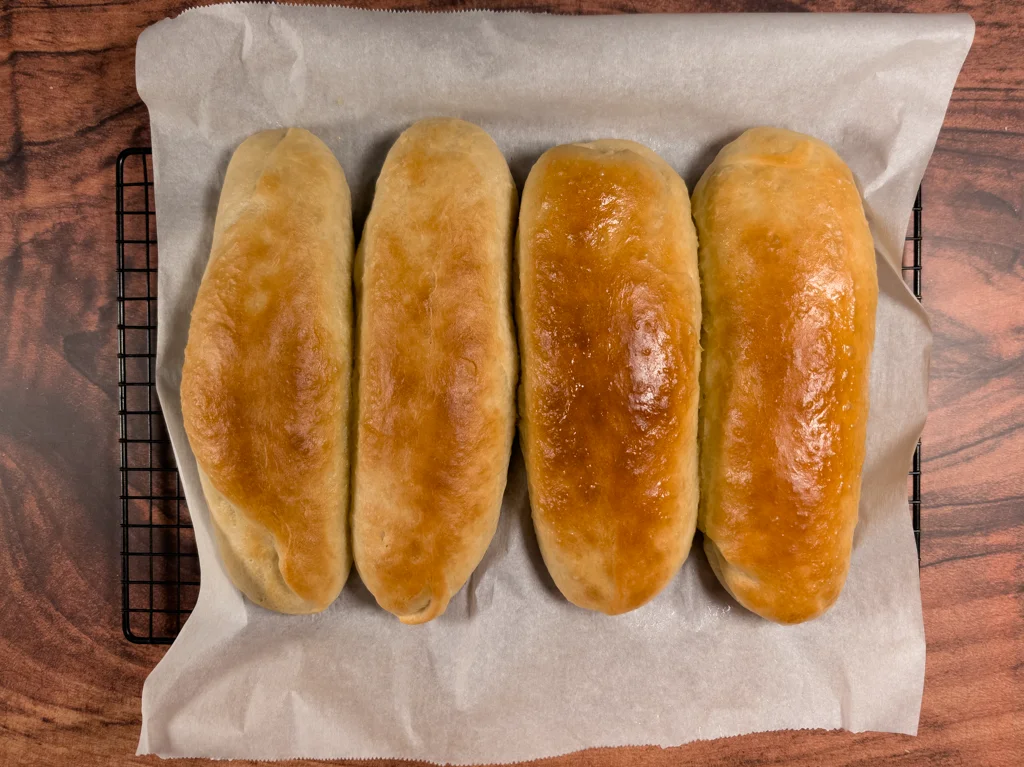
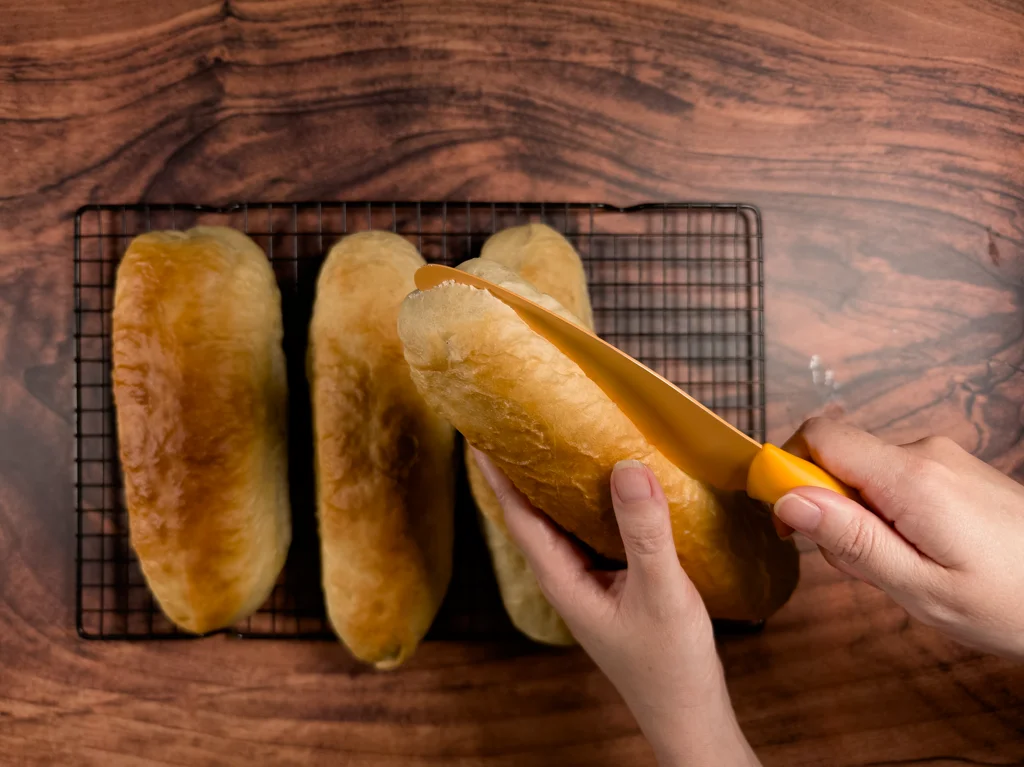
Bake at 350°F/177°C for 18-21 minutes, checking to make sure the tops are golden brown. Remove from the oven, brush the tops with melted butter (optional to keep it vegan) and let rest for 30 minutes on a wire cooling rack before slicing in half along the side (lengthwise) and stuffing full of your favorite sandwich ingredients.
Notes
If you don’t have a stand mixer, not to worry! Wherever the instructions mention to mix on low, this is where you’ll be kneading the dough by hand, at first in the bowl with a wooden spoon (steps 1 & 2) and then on a lightly floured surface (steps 3 & 4) once a soft dough ball begins to form.
The first step instructs you to activate the yeast. Most bakers skip this step if using instant yeast. I like to include this step to ensure the yeast hasn’t expired.
If refrigerating or freezing the dough to be used for later, stop before step 10, the proofing step. Once you’re ready to bake the dough rolls, bring thawed dough to room temperature before continuing on with step 10. Please see additional storage instructions in the How to Store section.
On steps 5, 7, & 10, your kitchen counter is a good spot to allow the dough to rise, unless, if you have a cold kitchen like I do. In that case, I like to use my oven with only the oven light turned on as a warm spot for proofing. Do not allow the dough to rise in the oven while preheating it. Doing so could kill the yeast and lead to uneven baking.
Serving Suggestion
Serve sliced in half along the side (lengthwise) stuffed full of your favorite sandwich ingredients. Some ideas are: grilled chicken Caesar salad sandwiches, chopped Italian subs, or caprese pesto sandwiches.
How to Store
Sub sandwich rolls can be stored in a bread box for 2-3 days or wrapped in plastic wrap in the refrigerator for up to 1 week. Store in an airtight freezer container and freeze for up to 1 month.
To serve these rolls again, heat in a preheated oven at 350°F until warmed through, about 3-5 minutes or about 10-15 minutes from frozen.
If refrigerating or freezing the dough rolls to be used for later, stop before step 10, the proofing step. Wrap the dough rolls with plastic wrap before placing it in the refrigerator or freezer. This pre-proofed dough can be stored in the refrigerator for 3-5 days or in the freezer for up to 1 month. Once you’re ready to bake the dough rolls, if frozen, allow the dough to thaw overnight in the fridge. Bring thawed dough to room temperature before continuing on with step 10.
Common Questions
The yeast didn’t bubble, is it still usable?
Maybe, but most likely no. Did you allow the yeast to sit with warm water and sugar for at least 10 minutes? Try covering the bowl if you have a fan or AC running. If that still doesn’t work and you’re not seeing bubbles forming, the yeast you’re using may be inactive or expired, rendering it unusable.
My dough isn’t sticky, what should I do?
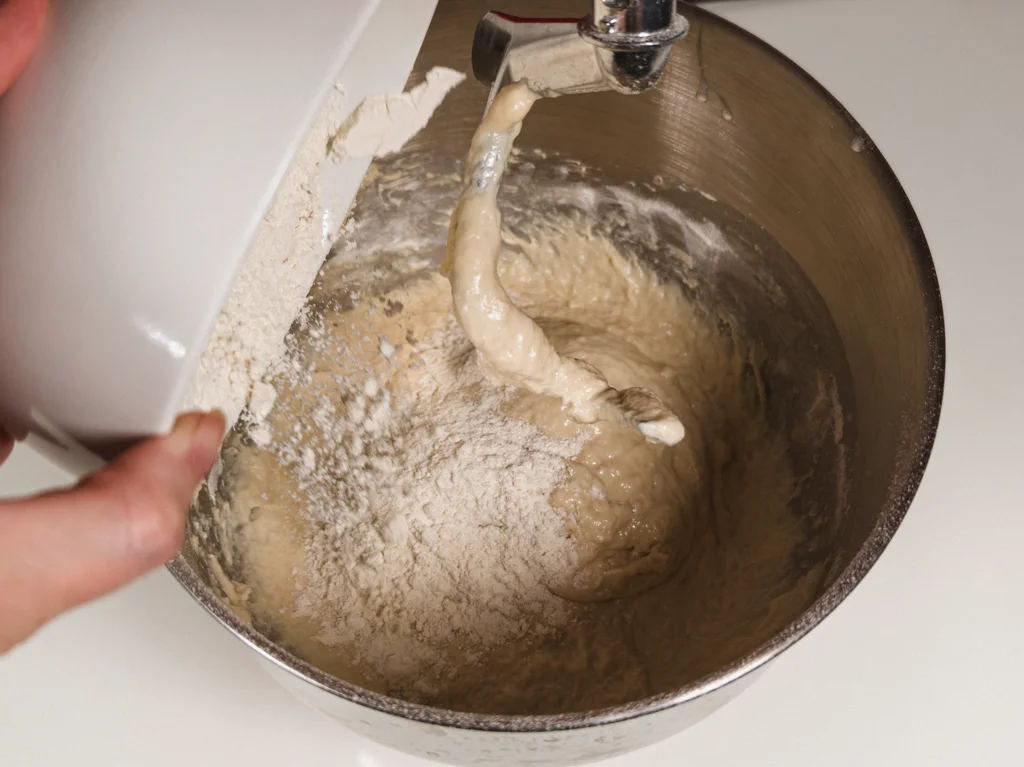
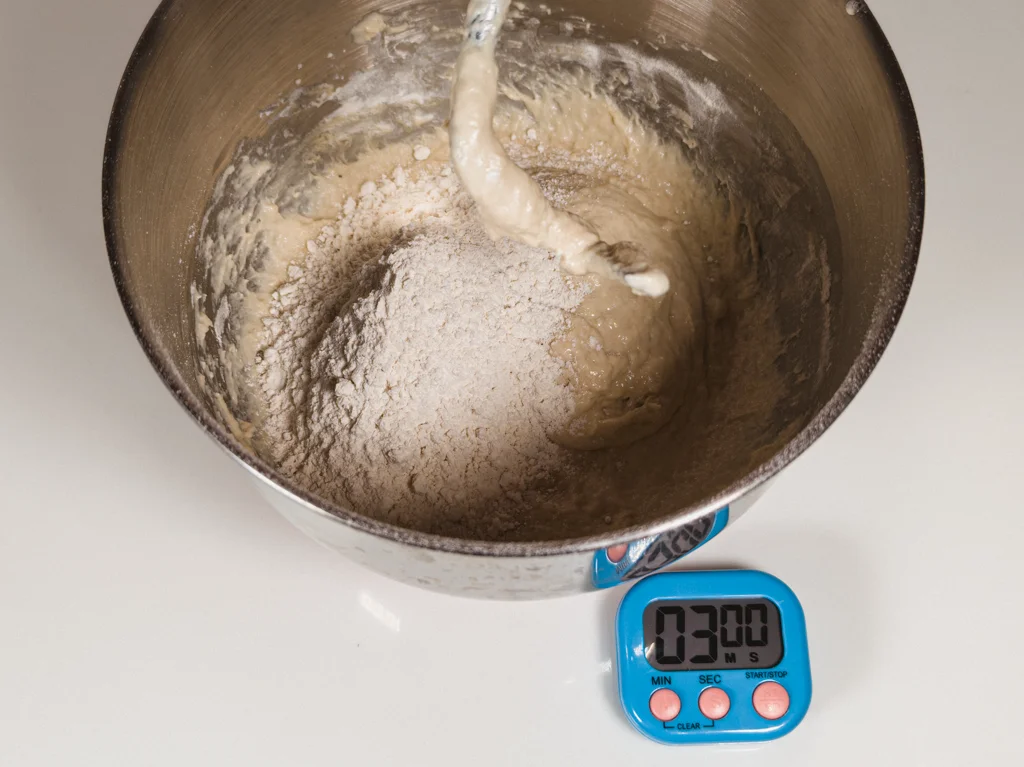
If your dough ball is a little on the harder side, add a tiny bit of water (start with 1 tablespoon) and work it into the dough until slightly sticky. If it’s not enough, add a tiny bit more water and keep kneading the dough.
My dough is too sticky, it’s not forming into a ball. What should I do?
Typically, the dough just needs more kneading time, but if it has way too much liquid and isn’t coming together at all, add a tiny bit of flour (start with 1 tablespoon) and work it into the dough until slightly sticky. If it’s not enough, add a tiny bit more and keep kneading the dough.

Sub Sandwich Rolls
As an Amazon Associate, I earn from qualifying purchases at no extra cost to you. This post contains affiliate links.
Equipment
- stand mixer with bowl (dough hook attachment)
- wooden spoon (if not using stand mixer)
- large bowl (if not using stand mixer)
- baking sheet (18"x13" – lined with parchment paper)
- kitchen scale (optional)
Ingredients
- 1 cup water (warm, 110°F)
- 2 tbsp sugar (raw or refined)
- 2 tsp yeast (instant)
- ¼ cup olive oil (extra virgin)
- 4 cups flour (all-purpose or bread flour)
- 1 tsp salt
- melted butter (for tops – optional for vegan)
Instructions
- Combine 1 cup water (about 236g), 2 tbsp sugar (about 30g), and 2 tsp yeast (about 8g) into the stand mixer bowl. Allow the yeast to activate for 10 minutes. Yeast will begin to foam.2 tbsp sugar, 1 cup water, 2 tsp yeast

- The 4 cups flour (about 480g) will be added gradually throughout the next few steps, as directed. Add ¼ cup olive oil (about 53g), 2 cups flour (about 240g), and then 1 tsp salt (about 7g) on top of the flour, into the bowl. Mix the ingredients with the hook attachment on a stand mixer using the lowest setting. Mix for 3 minutes.¼ cup olive oil, 4 cups flour, 1 tsp salt

- Scrape down the sides with a spatula if needed. Add the third cup of flour (about 120g) and continue to mix on low for another 3 minutes. A soft dough ball will begin to form.4 cups flour

- Add the remaining cup of flour (about 120g) to the dough and continue to mix on low for another 3 minutes or until the dough is soft but not sticking to the sides of the bowl.4 cups flour

- Remove the bowl from the stand mixer and cover with a kitchen towel. Allow the dough to rise for 30 minutes in a warm spot.

- Once the dough has doubled in size, gently punch down the dough to release any built up air. Return the bowl to the stand mixer and mix on low for 6 minutes.

- Remove the bowl from the stand mixer, cover with a kitchen towel and allow the dough to rise for another 30 minutes in a warm spot.

- Once the dough has doubled in size, remove the dough from the bowl. Place on a clean, smooth surface and begin dividing the dough rolls by cutting the dough in half with a bench scraper or knife. Each half will be cut in half, creating 4 pieces of dough.

- On a clean, smooth surface, roll each piece into a 9" long loaf.

- Place each roll on a baking sheet lined with parchment paper. Allow the loaves of dough to proof for 1 hour, covered, in a warm spot.

- Bake at 350°F/177°C for 18-21 minutes, checking to make sure the tops are golden brown. Remove from the oven, brush the tops with melted butter (optional to keep it vegan) and let rest for 30 minutes on a wire cooling rack before slicing in half along the side (lengthwise) and stuffing full of your favorite sandwich ingredients.
